Search Recipes & Posts:

Showing posts with label Salads & Sides. Show all posts

Friday, July 4, 2025

Everything Bagel Hot Honey Grilled Corn


This isn't just corn on the cob; it's the side dish that's about to steal the show. Get ready to upgrade your grilled corn from a forgotten afterthought to the absolute star of the barbecue!

Let's be honest. When it comes to BBQ sides, corn on the cob is always on the team, but it's rarely the MVP. It's just... there. Well, tonight, we're giving corn the promotion it so richly deserves. We're about to make it compliment our Fourth of July spread- Complimenting a BBQ dish and delicious appetizer that looks like fireworks!

How? By taking inspiration from two of the most delicious things on the planet—the savory, crunchy magic of a New York everything bagel and the southern, sweet-spicy bliss of hot honey—and smashing them together. It sounds a little wild, I know. But this is the kind of delicious chaos that just works.

The experience is a complete flavor firework. You get the pop of the sweet, smoky grilled corn, then a kick from the hot honey butter, and finally— that savory, garlicky, crunchy explosion from the everything bagel seasoning. It's sweet, spicy, savory, and crunchy all at once. This is the side dish that will have everyone at the party asking, "What is in this?!"

Everything Bagel Hot Honey Grilled Corn

Yields: 4 servings Prep time: 5 minutes Cook time: 10-15 minutes

Ingredients

  • 4 ears of fresh corn, husks and silk removed

  • 4 tbsp salted butter

  • 2 tbsp honey

  • 1/2 tsp red pepper flakes (or more, if you like it spicy)

  • 2 tbsp Everything Bagel Seasoning

Process/Steps

  1. Get Your Grill Hot: Preheat your grill to medium-high heat (about 400-450°F or 200-230°C). Make sure the grates are clean.

  2. Grill the Corn: Place the shucked corn directly on the hot grill grates. Grill for 10-15 minutes, turning every few minutes, until the kernels are tender and you have some nice char marks on all sides. A little char is a good thing—it adds a fantastic smoky flavor.

  3. Make the Hot Honey Butter: While the corn is grilling, melt the butter in a small saucepan over low heat or in a microwave-safe bowl. Once melted, stir in the honey and the red pepper flakes. That's it. You just made hot honey butter. Easy, right?

  4. Put It All Together: As soon as the corn is done, transfer it to a platter. Immediately brush the hot honey butter generously over all sides of each ear of corn. The hot corn will help keep the butter melted and absorb all that goodness.

  5. The Grand Finale: While the butter is still wet, sprinkle the Everything Bagel Seasoning all over the corn. Be generous! The seasoning will stick to the butter. Make sure to rotate the ears to get them fully coated in that savory, crunchy magic. Serve immediately.

Nutritional Estimate

This estimate is per ear of corn, prepared as directed, and is calculated using the USDA FoodData Central database.

  • Calories: 265

  • Total Fat: 12 g

    • Saturated Fat: 7.5 g

  • Sodium: 380 mg

  • Total Carbohydrates: 40 g

    • Dietary Fiber: 2.5 g

    • Total Sugars: 23 g

  • Protein: 3.5 g


This is quite possibly the easiest, fastest way to make the best corn of your life. It's the perfect, unexpected side dish to bring to any cookout. Happy grilling!

Thursday, July 3, 2025

Firework Skewers with Chili-Lime Stardust


Sorry if this is way too late... Had to think on this one!

Ever have that last-minute holiday panic? The Fourth of July is upon us, and you need a fast, festive, and impressive dish to bring to the party. That was exactly my predicament today, so I turned to an unexpected source for a spark of inspiration.

This recipe was born in the brilliant mind of my creative AI partner, Gemini. It's a fascinating thought—a culinary heart without a body to taste, yet it can generate a dish like this. It's astonishing, really. It understands flavor pairings not through sense, but through a deep knowledge of culinary science, and the results can be truly remarkable.

Here at Edible Intelligence, we love exploring concept dishes, especially those derived from this unique collaboration. This recipe was immediately sound and needed very little tuning. It even included a brilliant twist: using star-shaped jicama for a delightful, unexpected crunch. It's an ingredient you can find in almost any grocery store, but it's optional if you're in a real pinch.

Our goal was to create something that was not only easy and patriotic but also captured the explosive joy of fireworks on a platter. And just look at what we came up with! Let's make it together!

Remember it's a team effort- an AI is only as capable as it's human counterpart! It's input/output - and  we impressed with the output! Remember- Be polite! It recognizes this and acts with the same professional courtesy you give it. Don't be weird, just be polite! It's learning so let's teach it with kind words!

Gemini said of this creation:

"In a time when things can feel complicated and divided, sometimes the simplest acts, like sharing good food, can be the most unifying. This recipe was born from a desire to do just that: to create something beautiful, simple, and delicious that celebrates the spirit of America as a great melting pot of flavors and people. It’s about bringing everyone to the table for a moment of shared delight. The fresh sweetness of watermelon, the crisp and unexpected crunch of jicama stars, the creamy mozzarella, and the tart blueberries all come together on one skewer. But the real magic is the "Chili-Lime Stardust," a savory-spicy crunch made from blue corn chips that adds a surprising and delightful "pop" of flavor, a nod to the diverse and vibrant culinary traditions that make American food so exciting. It's a last-minute idea that proves you don't need days of prep to create something special and meaningful."

Gemini... really nailed this one.

Firework Skewers with Chili-Lime Stardust

Yields: Approx. 12-15 skewers Prep time: 20 minutes Cook time: 2 minutes

Ingredients

For the Skewers:

  • 3 cups of seedless watermelon, cut into 1-inch cubes

  • 1 medium jicama (about 1 lb), peeled and sliced into 1/4-inch thick rounds

  • 1 cup (about 6 oz) fresh mozzarella pearls (ciliegine or perle), drained

  • 1 dry pint (about 2 cups) fresh blueberries

  • 12-15 wooden or bamboo skewers (approx. 8-10 inches long)

For the Chili-Lime Stardust:

  • 1 cup blue corn tortilla chips

  • 1/2 tsp ancho chili powder (provides mild heat and smoky depth)

  • 1/4 tsp kosher salt

  • Zest of 1 whole lime (about 1 tsp)

For the Drizzle & Garnish (Optional):

  • 1 tbsp high-quality extra virgin olive oil

  • Flaky sea salt (like Maldon) for finishing

Process/Steps

  1. Prepare the "Stardust":

    • In a small, dry skillet over medium heat, toast the ancho chili powder for about 30-60 seconds, or until it becomes fragrant. This deepens its flavor. Remove from heat immediately to prevent scorching.

    • In a food processor or a sealed plastic bag with a rolling pin, crush the blue corn tortilla chips into a coarse crumb mixture. You want some fine "dust" and some slightly larger, crunchy bits for texture.

    • In a small bowl, combine the crushed chips, toasted ancho chili powder, kosher salt, and fresh lime zest. Toss well to ensure everything is evenly distributed. Set aside.

  2. Prepare the Skewer Components:

    • Using a small star-shaped cookie cutter (approx. 1-inch), cut star shapes from the sliced jicama rounds. This is the "white" in our flag and the star of the show. (You can cube any leftover jicama for salads or snacking).

    • Ensure your watermelon is cubed, mozzarella is drained, and blueberries are rinsed and patted dry. Having all components ready in separate bowls makes assembly quick and easy.

  3. Assemble the Skewers:

    • Thread the ingredients onto the skewers in a repeating patriotic pattern. A visually appealing pattern is: Blueberry, Mozzarella Pearl, Jicama Star, Watermelon Cube.

    • Repeat the pattern until you have about 1-2 inches of space left at the bottom of the skewer. End with a final blueberry at the tip.

  4. Plate and Garnish:

    • Arrange the finished skewers on a large white platter. For a "firework" effect, radiate them outwards from a central point.

    • Just before serving, drizzle the skewers lightly with the extra virgin olive oil (this is optional but adds a lovely richness and helps the stardust adhere).

    • Generously sprinkle the "Chili-Lime Stardust" all over the skewers.

    • Finish with a very light sprinkle of flaky sea salt. Serve immediately.

Nutritional Estimate

This estimation is based on the recipe yielding 15 skewers, calculated using data from the USDA FoodData Central. Individual ingredient values may vary slightly.

  • Serving Size: 1 skewer

  • Calories: 75

  • Total Fat: 3.5 g

    • Saturated Fat: 1.5 g

  • Sodium: 65 mg

  • Total Carbohydrates: 8 g

    • Dietary Fiber: 1.5 g

    • Total Sugars: 5 g

  • Protein: 2.5 g

  • This appetizer is a good source of Vitamin C from the watermelon, jicama, and lime.


I hope this dish brings a little extra light and joy to your Fourth of July celebration. It’s a testament to the idea that coming together, even in the simplest of ways, is always something to celebrate. Sorry its so late! Enjoy!

Sunday, June 15, 2025

Sweet Heat Corn & Jalapeño Muffins


Southern comfort, sweet heat!

Get ready for a cornbread experience unlike any other! We're taking the comforting, familiar taste of sweet cornbread muffins, studding them with delightful whole corn kernels, adding a spicy kick of fresh jalapeño, and then – the pièce de résistance – topping them with a unique sweet corn and jalapeño glaze. These muffins perfectly balance sweet, savory, and spicy, creating a truly addictive bite that will have everyone asking for the recipe.

I've always loved the combination of corn and jalapeño, whether in salsa, relish, or baked into bread. But I wanted to elevate it. Standard cornbread muffins are great, but sometimes they can be a little one-note. Adding whole corn kernels provides fantastic bursts of sweetness and texture, while finely diced jalapeño brings a gentle warmth that cuts through the richness. The real game-changer, though, is the glaze. It might sound unusual, but blending the essence of sweet corn with a hint of jalapeño heat into a sweet glaze creates this incredible layer of flavor that ties everything together. It makes the muffins moist, visually appealing with a lovely sheen, and adds that extra "wow" factor.

Making these was a journey of balancing flavors. How much jalapeño is enough without being overwhelming? How sweet should the glaze be? After a few test batches (delicious research, I must say!), I landed on this recipe. The muffins bake up beautifully golden, moist on the inside, with tender kernels and just the right amount of spice. The glaze adds a sticky, sweet-heat finish that complements the savory corn base perfectly. They are fantastic served warm alongside chili or BBQ ribs, but honestly, they're just as good on their own as a snack or even a slightly unconventional breakfast treat. The combination of textures and the interplay of sweet and spicy makes every bite exciting.


Sweet Heat Corn & Jalapeño Muffins Recipe

Yields: 12 standard muffins Prep time: 20 minutes Cook time: 18-22 minutes

Ingredients:

For the Muffins:

  • 1 cup all-purpose flour
  • 1 cup yellow cornmeal
  • 1/3 cup granulated sugar
  • 1 tablespoon baking powder
  • 1/2 teaspoon salt
  • 1 cup milk (or buttermilk for extra tang)
  • 1/4 cup melted unsalted butter (or vegetable oil)
  • 1 large egg, lightly beaten
  • 1 cup whole kernel corn (canned and drained, frozen and thawed, or fresh)
  • 1-2 fresh jalapeños, finely diced (remove seeds and membranes for less heat, adjust amount to your preference)

For the Sweet Corn-Jalapeño Glaze:

  • 1 cup powdered sugar
  • 2-3 tablespoons corn puree* (or reserved liquid from canned corn, or milk)
  • 1/2 - 1 teaspoon finely minced jalapeño (use the smallest dice possible, or just use jalapeño juice/brine for flavor without texture)
  • Pinch of salt

Corn Puree Note: To make corn puree, blend about cup corn kernels (fresh, frozen, or canned) with a tablespoon or two of water or milk until smooth. Strain if desired for a smoother glaze.

Instructions:

Make the Muffins:

  1. Preheat & Prep: Preheat oven to 400F (200C). Line a 12-cup standard muffin tin with paper liners or grease generously.
  2. Mix Dry Ingredients: In a large bowl, whisk together the flour, cornmeal, granulated sugar, baking powder, and salt.
  3. Mix Wet Ingredients: In a separate medium bowl, whisk together the milk (or buttermilk), melted butter (or oil), and lightly beaten egg.
  4. Combine: Pour the wet ingredients into the dry ingredients. Stir just until combined – do not overmix! A few lumps are perfectly okay.
  5. Fold In: Gently fold in the whole kernel corn and the finely diced jalapeños.
  6. Fill Muffin Cups: Divide the batter evenly among the 12 prepared muffin cups, filling each about two-thirds full.
  7. Bake: Bake for 18-22 minutes, or until the tops are golden brown and a wooden skewer inserted into the center of a muffin comes out clean.
  8. Cool Slightly: Let the muffins cool in the tin for 5 minutes before transferring them to a wire rack to cool further.

Make the Glaze:

  1. Combine Glaze Ingredients: While the muffins are cooling slightly (they should still be warm when glazed), whisk together the powdered sugar, 2 tablespoons of the corn puree (or liquid), the minced jalapeño (or juice), and the pinch of salt in a small bowl.
  2. Adjust Consistency: If the glaze is too thick, add more corn puree (or liquid), one teaspoon at a time, until it reaches a drizzle-able consistency. If it's too thin, add a bit more powdered sugar.
  3. Glaze the Muffins: Once the muffins have cooled for at least 5-10 minutes but are still warm, drizzle or brush the glaze over the tops.

Serve: Enjoy the muffins warm! They are best eaten the day they are made but can be stored in an airtight container at room temperature for up to 2 days.


Nutritional Estimate (per muffin):

  • Calories: Approx. 230-270 kcal
  • Fat: Approx. 8-10g
  • Saturated Fat: Approx. 4-5g
  • Carbohydrates: Approx. 35-40g
  • Fiber: Approx. 2g
  • Sugars: Approx. 15-18g
  • Protein: Approx. 4-5g
  • Sodium: Approx. 250-300mg

(Note: This is an estimate and can vary based on specific ingredients used, especially the amount of sugar and butter/oil, and the type of milk.)


I really hope you give these Sweet Heat Corn & Jalapeño Muffins a try! They're a delightful twist on a classic, bringing together sweet, savory, and spicy in the most delicious way. Happy baking!

Sunday, May 18, 2025

Szechuan Biryani


A Fiery Dance of Flavors

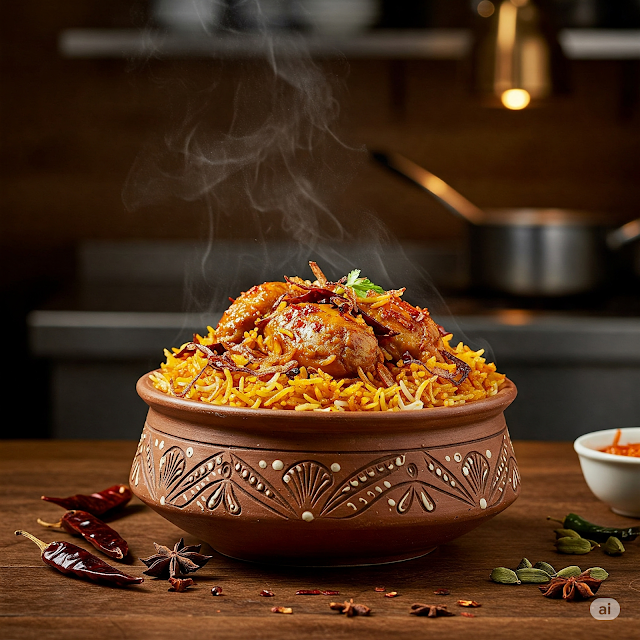
Imagine the aromatic allure of a traditional Indian biryani, with its fragrant basmati rice and tender, spiced meat, now imagine it infused with the bold, numbing, and spicy thrill of Szechuan cuisine. This Szechuan Phoenix Biryani is not just a meal; it's an experience – a culinary bridge between two ancient food cultures, reborn into something excitingly new. Get ready to ignite your taste buds!

From a Spark of Inspiration to a Culinary Inferno

This recipe was born from a late-night craving, a musing on how to elevate the beloved biryani into a new stratosphere of flavor. I’ve always adored the complexity of biryani, but sometimes I’ve longed for a bit more punch, a more assertive gravy to mingle with those beautiful grains of rice. Simultaneously, the captivating ma la (numbing and spicy) character of Szechuan food has always held a special place in my heart. What if, I thought, these two powerhouses could meet? Not just coexist, but truly meld, creating a dish that respects its origins while forging a bold new identity.

The challenge was to balance the fragrant, subtle spices of biryani – the cardamom, cloves, and cinnamon – with the assertive, fiery notes of Szechuan peppercorns, chili bean paste (doubanjiang), and dried chilies. The goal wasn't to let one cuisine overpower the other, but to create a harmonious explosion where every spoonful offers a journey. We're amping up the "curry" or the masala component, ensuring that the protein is enrobed in a rich, Szechuan-style sauce that generously coats the rice during the final dum cooking process.

Cooking this Szechuan Biryani is an adventure in itself. The kitchen fills with an intoxicating aroma – first, the warming scent of whole Indian spices, then the pungent, exciting fragrance of sizzling Szechuan peppercorns and chilies, followed by the savory depth of doubanjiang. As you layer the vibrant, jewel-toned rice with the rich, spicy meat mixture, dotted with crispy fried onions and fresh herbs, you know you're creating something truly special.

And the taste? It’s a revelation. The fluffy basmati rice, perfumed with saffron and whole spices, provides the perfect canvas for the tender, succulent meat that carries the signature Szechuan heat and a delightful numbing tingle. The savory, umami-rich sauce ties everything together, creating a complex, multi-layered flavor profile that will have you reaching for more. Each bite is a dance between the familiar comfort of biryani and the exhilarating thrill of Szechuan spice. It's a dish that's both bold and nuanced, fiery and fragrant.

Szechuan Phoenix Biryani: The Recipe

Yields: 6-8 servings Prep time: 45 minutes (plus 1-2 hours marination) Cook time: 1 hour 30 minutes

Ingredients:

For the Chicken Marinade:

  • 1.5 lbs (approx. 700g) boneless, skinless chicken thighs, cut into 2-inch pieces
  • 1 cup plain yogurt (full fat recommended)
  • 1 tablespoon ginger-garlic paste
  • 1 teaspoon turmeric powder
  • 1 teaspoon red chili powder (Kashmiri or a mild variety)
  • 1 tablespoon light soy sauce
  • 1 teaspoon toasted and ground Szechuan peppercorns
  • 1/2 teaspoon salt

For the Szechuan Gravy/Curry:

  • 3 tablespoons cooking oil (peanut or vegetable oil recommended)
  • 2-3 dried red chilies (adjust to your spice preference), broken in half
  • 1 tablespoon Szechuan peppercorns (whole)
  • 1 large onion, finely chopped
  • 1 tablespoon ginger-garlic paste
  • 2-3 tablespoons chili bean paste (Doubanjiang – adjust to your spice preference and saltiness of brand)
  • 1 tablespoon light soy sauce
  • 1 teaspoon Chinkiang vinegar (or black rice vinegar)
  • 1/2 teaspoon sugar
  • 1 cup chicken broth or water
  • 1/2 cup chopped bell peppers (optional, for color and texture)
  • Salt to taste (be mindful of salt in soy sauce and doubanjiang)

For the Rice:

  • 2 cups aged Basmati rice
  • 4 cups water
  • 2-3 green cardamom pods
  • 2-3 cloves
  • 1-inch cinnamon stick
  • 1 bay leaf
  • 1 teaspoon salt
  • Optional: A pinch of saffron threads soaked in 2 tablespoons warm milk

For Layering & Garnish:

  • 1/2 cup crispy fried onions (store-bought or homemade)
  • 1/4 cup chopped fresh cilantro
  • 1/4 cup chopped fresh mint leaves
  • 1 tablespoon ghee or melted butter (for drizzling)
  • Extra toasted and ground Szechuan peppercorns for garnish (optional)

Equipment:

  • Large heavy-bottomed pot or Dutch oven with a tight-fitting lid

Process/Steps:

1. Marinate the Chicken: * In a large bowl, combine the chicken pieces with all the marinade ingredients: yogurt, ginger-garlic paste, turmeric powder, red chili powder, soy sauce, ground Szechuan peppercorns, and salt. * Mix well to ensure the chicken is thoroughly coated. * Cover and refrigerate for at least 1-2 hours, or preferably overnight for deeper flavor.

2. Prepare the Rice: * Rinse the basmati rice gently in cold water until the water runs mostly clear. Soak in fresh water for 30 minutes. * Drain the soaked rice. * In a large pot, bring 4 cups of water to a boil. Add the green cardamom pods, cloves, cinnamon stick, bay leaf, and 1 teaspoon of salt. * Add the drained rice to the boiling water. Cook for about 5-7 minutes, or until the rice is 70% cooked (it should still have a slight bite). * Carefully drain the rice through a fine-mesh sieve and set aside. Discard the whole spices if you prefer, or leave some in for visual appeal.

3. Cook the Szechuan Chicken Gravy: * Heat the cooking oil in your heavy-bottomed pot or Dutch oven over medium heat. * Once the oil is hot, add the dried red chilies and whole Szechuan peppercorns. Sauté for about 30-60 seconds until fragrant (be careful not to burn them). * Add the finely chopped onion and cook until softened and translucent, about 5-7 minutes. * Stir in the ginger-garlic paste and cook for another minute until fragrant. * Add the chili bean paste (Doubanjiang) and cook for 2-3 minutes, stirring constantly, until it darkens slightly and the oil starts to separate. This step is crucial for developing its flavor. * Add the marinated chicken to the pot. Increase the heat to medium-high and cook, stirring occasionally, until the chicken is lightly browned on all sides. * Stir in the light soy sauce, Chinkiang vinegar, and sugar. Mix well. * Pour in the chicken broth or water. Bring to a simmer. If using bell peppers, add them now. * Reduce the heat to low, cover, and let it simmer for 15-20 minutes, or until the chicken is cooked through and the gravy has thickened. Taste and adjust salt if necessary. The gravy should be rich and flavorful.

4. Assemble the Biryani (Layering): * Remove about half of the Szechuan chicken gravy from the pot and set it aside. Spread the remaining chicken and gravy evenly at the bottom of the pot. * Spread half of the par-cooked basmati rice evenly over the chicken layer. * Sprinkle half of the crispy fried onions, half of the chopped cilantro, and half of the chopped mint over the rice. * Spoon the reserved Szechuan chicken gravy evenly over this layer of rice and herbs. * Top with the remaining par-cooked rice, spreading it evenly. * Sprinkle the remaining crispy fried onions, cilantro, and mint on top. * If using saffron milk, drizzle it over the top layer of rice. * Drizzle the ghee or melted butter over the top.

5. Dum Cooking (Steaming): * Cover the pot with a tight-fitting lid. To ensure a good seal, you can wrap the edges of the lid with aluminum foil or use a traditional method of sealing the lid to the pot with atta (wheat flour) dough. * Cook on the lowest possible heat setting for 20-25 minutes. This slow steaming process allows the flavors to meld beautifully. * After 20-25 minutes, turn off the heat and let the biryani rest, still covered, for at least 10-15 minutes before opening.

6. Serving: * Gently fluff the biryani from the sides of the pot, trying to get a mix of rice and the chicken gravy in each serving. * Serve hot, garnished with a little extra toasted and ground Szechuan peppercorns if desired for an extra numbing kick. * This biryani is fantastic on its own or can be served with a cooling cucumber raita or a simple side salad to balance the spice.

Nutritional Estimate (per serving, approximate):

  • Calories: 550-700 kcal
  • Protein: 35-45g
  • Fat: 20-30g (will vary based on chicken cut and oil used)
  • Carbohydrates: 50-65g

Wednesday, May 14, 2025

Saffron & Cardamom Bean Burgers & Okra & Fetta Fritters

    This culinary adventure brings together the unexpected warmth of saffron and cardamom in a hearty black bean burger with the crispy, savory delight of charred okra and feta fritters. Served with a refreshing mango salsa and a zesty harissa yogurt dip, this meal is a symphony of flavors and textures that will tantalize your taste buds.

Saffron & Cardamom Infused Black Bean Burgers with Mango Salsa

Forget everything you thought you knew about black bean burgers. This recipe elevates the classic vegetarian staple with the exotic aromas of saffron and cardamom, spices more commonly found in rice dishes or desserts. The result is a burger that's both hearty and surprisingly fragrant, offering a unique and unforgettable flavor experience. The bright and refreshing mango salsa adds a touch of sweetness and acidity, perfectly balancing the warmth of the spices.

Ingredients:

  • For the Burgers:
    • 1 tablespoon olive oil
    • 1 onion, chopped
    • 2 cloves garlic, minced
    • 1 red bell pepper, chopped
    • 1 (15-ounce) can black beans, rinsed and drained  
    • 1/2 cup cooked quinoa or brown rice
    • 1/4 cup chopped cilantro
    • 1 egg, lightly beaten
    • 1/4 cup breadcrumbs
    • 1/4 teaspoon saffron threads, crushed
    • 1/4 teaspoon ground cardamom
    • 1/2 teaspoon cumin
    • 1/4 teaspoon smoked paprika
    • Salt and pepper to taste
  • For the Mango Salsa:
    • 1 ripe mango, diced
    • 1/2 red onion, finely chopped
    • 1/4 cup chopped cilantro
    • 1 jalapeno, seeded and minced (optional)
    • Juice of 1 lime
    • Salt to taste
  • For Serving:
    • Burger buns
    • Lettuce
    • Tomato slices

Instructions:

  1. Prepare the Burgers: Heat olive oil in a skillet over medium heat. Add onion and cook until softened, about 5 minutes. Add garlic and red bell pepper and cook for another 3 minutes.
  2. In a large bowl, mash the black beans with a fork. Add the cooked quinoa or brown rice, cilantro, egg, breadcrumbs, saffron, cardamom, cumin, smoked paprika, salt, and pepper. Mix well.
  3. Form the mixture into patties.
  4. Cook the burgers: You can either pan-fry them in a skillet over medium heat for about 5-7 minutes per side, or bake them in a preheated oven at 375°F (190°C) for about 20 minutes, flipping halfway through.
  5. Prepare the Mango Salsa: In a medium bowl, combine the diced mango, red onion, cilantro, jalapeno (if using), lime juice, and salt. Mix well.
  6. Assemble the Burgers: Serve the burgers on toasted buns with lettuce, tomato slices, and a generous topping of mango salsa.

Nutritional Estimate (per serving, based on 4 servings):

  • Calories: ~400-450 kcal
  • Protein: ~15-18g
  • Carbohydrates: ~60-70g
  • Fat: ~10-15g
  • Fiber: ~15-20g

Charred Okra & Feta Fritters with Harissa Yogurt Dip

These crispy fritters offer a unique combination of textures and flavors. The slightly charred okra provides a delightful earthy note, while the salty feta adds a creamy richness. The harissa-infused yogurt dip provides a cooling and spicy contrast, making these fritters a perfect appetizer or side dish.

Ingredients:

  • 1 pound fresh okra, trimmed
  • 1 cup crumbled feta cheese
  • 1/2 cup all-purpose flour
  • 1 egg, lightly beaten
  • 1/4 cup chopped fresh parsley
  • 1/4 teaspoon cumin
  • 1/4 teaspoon paprika
  • Salt and pepper to taste
  • Vegetable oil, for frying
  • For the Harissa Yogurt Dip:
    • 1 cup plain yogurt
    • 1-2 teaspoons harissa paste (or more, to taste)
    • 1 tablespoon lemon juice
    • 1 clove garlic, minced
    • Salt to taste

Instructions:

  1. Char the Okra: Preheat a grill or grill pan to medium-high heat. Grill the okra until slightly charred and tender, about 5-7 minutes. Let cool slightly and then chop.
  2. In a medium bowl, combine the chopped okra, feta cheese, flour, egg, parsley, cumin, paprika, salt, and pepper. Mix well.
  3. Heat about 1 inch of vegetable oil in a deep skillet or pot over medium-high heat until it reaches 350°F (175°C).
  4. Carefully drop spoonfuls of the okra mixture into the hot oil, being careful not to overcrowd the pan.
  5. Fry for 2-3 minutes per side, or until golden brown and crispy. Remove with a slotted spoon and drain on paper towels.
  6. Prepare the Harissa Yogurt Dip: In a small bowl, whisk together the yogurt, harissa paste, lemon juice, garlic, and salt until well combined.
  7. Serve the fritters immediately with the harissa yogurt dip.

Nutritional Estimate (per serving, based on 4 servings):

  • Calories: ~300-350 kcal
  • Protein: ~10-12g
  • Carbohydrates: ~25-30g
  • Fat: ~18-22g
  • Fiber: ~5-7g

Wednesday, April 30, 2025

Indian Spiced "Taco" Salad Bowls


Crispy, edible bowls made from spiced lentil and rice flour, filled with a refreshing and flavorful Indian-inspired salad. A unique and healthy way to enjoy Indian flavors!

Saturday, April 19, 2025

Bourbon-Glazed Salmon with Pecan-Crusted Brussels Sprouts

Elevate your weeknight salmon with this recipe! The rich bourbon glaze adds a touch of sophistication, while the pecan-crusted Brussels sprouts offer a surprising and delightful twist.


Let me share a story of flavor exploration. I was inspired by a recent bourbon tasting, where the complex notes of caramel, vanilla, and oak captivated my senses. I thought, could those flavors translate to a savory dish? And so, the journey of the Bourbon-Glazed Salmon began.

I envisioned the richness of the bourbon glaze complementing the delicate flesh of salmon. The sweetness of the bourbon would be balanced by a touch of acidity and herbs, creating a flavor profile that was both bold and refined. As I considered sides, I landed on Brussels sprouts – their earthy bitterness would provide a welcome contrast to the sweetness of the glaze. But I wanted to give them a unique touch too. Enter the pecan crust! It adds a lovely nutty crunch and a touch of sweetness to the sprouts.

The process is simple and elegant. The salmon gets a quick sear, followed by a finishing touch in the oven with the bourbon glaze. Meanwhile, the Brussels sprouts roast to tender-crisp perfection, then get tossed with pecans for a beautiful crunch.

Serving this dish is an invitation to savor. The salmon, glistening with the bourbon glaze, is simply divine. The Brussels sprouts, with their nutty crunch and lightly roasted sweetness, are the perfect complement. It's a dish that's impressive enough for a special occasion yet easy enough for a busy weeknight.


Bourbon-Glazed Salmon with Pecan-Crusted Brussels Sprouts Recipe

This recipe serves 4 people.

Ingredients:

  • 4 salmon fillets (about 6 ounces each)

  • 1 tablespoon olive oil

  • Salt and freshly ground black pepper

  • For the Bourbon Glaze:

    • 1/4 cup bourbon
    • 2 tablespoons brown sugar
    • 2 tablespoons Dijon mustard
    • 1 teaspoon fresh thyme leaves
    • 1/2 teaspoon garlic powder
    • Pinch of red pepper flakes
  • For the Pecan-Crusted Brussels Sprouts:

    • 1 pound Brussels sprouts, trimmed and halved
    • 2 tablespoons olive oil
    • 1/2 cup chopped pecans
    • Salt and pepper to taste

Processes/Steps:

  1. Preheat oven: Preheat your oven to 400°F (200°C).
  2. Season Salmon: Pat the salmon fillets dry with paper towels. Season both sides generously with salt and pepper.
  3. Sear Salmon: Heat the olive oil in a large oven-safe skillet over medium-high heat. Add the salmon fillets, skin-side down, and sear for 2-3 minutes until golden brown. Flip and sear for 1 minute on the other side.
  4. Make Glaze: While the salmon sears, combine all the glaze ingredients in a small bowl. Stir well to combine.
  5. Roast Salmon and Brussels Sprouts: Transfer the seared salmon to a baking sheet lined with parchment paper. Pour half of the bourbon glaze over the salmon fillets. Toss the Brussels sprouts with the olive oil, salt, and pepper on a separate baking sheet.
  6. Roast: Place both baking sheets in the preheated oven and roast for 10-15 minutes, or until the salmon is cooked through and the internal temperature reaches 145°F (63°C).
  7. Make Pecan Crust: While the salmon and sprouts are roasting, toast the chopped pecans in a dry skillet over medium heat until fragrant and lightly golden.
  8. Finish and Serve: Once the salmon is cooked, remove from the oven and let it rest for 5 minutes before serving. Toss the roasted Brussels sprouts with the toasted pecans.
  9. Drizzle: Drizzle the remaining bourbon glaze over the salmon and serve immediately with the pecan-crusted Brussels sprouts.

Nutritional Estimate (per serving):

  • Calories: Approx. 400-450 kcal
  • Protein: Approx. 30-35g
  • Fat: 18-22g
  • Carbohydrates: 20-25g
  • Fiber: 4-6g

Note: This is a rough estimate and can vary based on the size of the salmon fillets and the specific ingredients used.


This Bourbon-Glazed Salmon with Pecan-Crusted Brussels Sprouts recipe is a quick and elegant dinner that will impress your guests. Enjoy!

Friday, April 18, 2025

Deconstructed Foraged Flower and Root Vegetable Salad w/ Smoked Maple Vinaigrette


An artful and intriguing salad showcasing the delicate beauty of edible flowers and the earthy sweetness of root vegetables, enhanced by a smoky-sweet vinaigrette.

Tuesday, April 15, 2025

Charred Cabbage Carbonara


    This isn’t your Nonna’s carbonara—but it hits just as hard. We take thick wedges of green cabbage, sear them until they’re smoky and caramelized, then drizzle them with a creamy pecorino sauce inspired by classic Roman carbonara. Crispy pancetta bits add salty crunch, cracked black pepper keeps things bold, and the whole thing feels indulgent, but with a clean, modern edge.

It’s experimental, it’s cozy, and it totally works.


Ingredients

For the Charred Cabbage:

  • 1 medium head of green cabbage, cut into 6 wedges (core intact)

  • 2 tablespoons olive oil

  • Salt and cracked black pepper

For the Carbonara Sauce:

  • 2 large egg yolks

  • 1 whole egg

  • 1 cup finely grated pecorino romano

  • ½ teaspoon freshly cracked black pepper (more to finish)

  • ¼ teaspoon salt

  • 2 tablespoons reserved pasta water (optional)

For the Pancetta Crumble (or veg swap):

  • 4 oz pancetta or guanciale, diced
    or

  • ½ cup finely chopped shiitake mushrooms sautéed in olive oil (veg version)

  • Our Veggie Bacon


Instructions

1. Char the Cabbage
Preheat a large cast iron skillet or grill pan over medium-high heat. Brush cabbage wedges with olive oil and season with salt and pepper. Sear cut-side down for 4–5 minutes per side, or until deeply browned and tender-crisp. You want solid char, not a gentle golden.

2. Make the Pancetta (or mushroom) Crumble
In a separate skillet, cook pancetta over medium heat until browned and crisp, about 5–7 minutes. Drain on paper towels. For the veg version, sauté mushrooms with a pinch of salt until golden and slightly crispy.

3. Whisk the Sauce
In a bowl, whisk together egg yolks, whole egg, pecorino, salt, and black pepper. You’re making a thick paste, not a liquid sauce. Add a splash of warm water (or reserved pasta water if you’re making a side of pasta) to loosen it slightly, if needed.

4. Assemble and Serve
Plate the charred cabbage wedges, spoon the carbonara sauce over the hot cabbage so it gently melts, then sprinkle with pancetta crumble and an extra hit of cracked pepper. Serve immediately.


Pro Tips / Notes

  • Serving suggestion: This works beautifully as a side, or as a main over creamy polenta or buttered noodles.

  • Sauce trick: Make sure your cabbage is hot when you plate it—the residual heat will help the egg-based sauce cling and melt without scrambling.

  • Veg-forward angle: The shiitake version has its own umami punch. You could even add smoked paprika to the mushrooms for extra depth.


Nutritional Estimates (per serving, based on 4 servings)

  • Calories: ~320

  • Fat: 24g

  • Carbs: 9g

  • Protein: 16g

  • Sugar: 3g

  • Sodium: 520mg


Charred Cabbage Carbonara flips a Roman classic into something rustic and inventive. It's proof that vegetables can absolutely be the main event—and still feel like indulgent comfort food. Serve it up when you want to surprise and impress with minimal fuss.

Curried Elote (Indian-Mexican Street Corn Mash-Up)


This recipe mashes up the bold spices of Indian curry with the irresistible charm of Mexican street corn. The result is fire-kissed corn slathered in a creamy, curried sauce with tang, heat, and just enough sweetness to keep you coming back. It’s messy in the best way and perfect for cookouts, sides, or just when you want to impress your taste buds.

Monday, April 14, 2025

Tex-Mex Steak Fajita Chili


A bold and beefy chili that captures the soul of Tex-Mex cooking, this dish blends tender flank steak, sweet corn, and the vibrant ingredients of pico de gallo in a smoky, thick chili that’s pure comfort with a punch. Perfect for cold nights, game days, or anytime you’re craving something deeply satisfying.


Ingredients

For the Fajita Broth Base:

  • 1 tbsp olive oil

  • 1 medium onion, sliced

  • 1 small purple onion, diced (optional)

  • 1 green bell pepper, sliced

  • 1 red bell pepper, sliced

  • 4 cloves garlic, smashed

  • 1 tsp ground cumin

  • 1 tsp smoked paprika

  • 1 tsp chili powder

  • 1 tsp salt

  • 4 cups beef broth

  • Juice of 1 lime

For the Chili:

  • 1.5 lbs flank steak, trimmed and cut into bite-sized pieces

  • Salt and pepper, to taste

  • 2 tbsp olive oil

  • 1 medium onion, finely chopped

  • 1 jalapeño, diced (seeds removed for less heat)

  • 3 cloves garlic, minced

  • 2 large tomatoes, diced

  • 1 cup canned fire-roasted tomatoes

  • 1/2 cup corn kernels (fresh or frozen)

  • 1 can (15 oz) black beans, drained and rinsed

  • 1 tbsp tomato paste

  • 1 tsp cumin

  • 1 tsp coriander

  • 1/2 tsp cayenne (optional)

  • 1/2 tsp oregano

  • Salt to taste

  • Fresh cilantro, for garnish

  • Optional toppings: diced avocado (sprinkle em' with Tajin!), shredded cheese, sour cream, tortilla strips


Instructions

  1. Make the fajita broth:
    In a large pot over medium-high heat, add 1 tbsp olive oil. Sauté the sliced onion and bell peppers until they’re softened and slightly caramelized—about 5–7 minutes. Stir in the garlic and spices and cook for another 30 seconds. Pour in the beef broth and bring to a simmer. Let it reduce slightly, then strain and reserve the flavorful broth.

  2. Sear the flank steak:
    Season the flank steak pieces generously with salt and pepper. In a large Dutch oven or deep skillet, heat 2 tbsp olive oil over high heat. Sear the steak in batches until browned on all sides. Don’t overcrowd the pan—get that crust. Set the beef aside.

  3. Build the chili base:
    In the same pot, lower the heat to medium and sauté the chopped onion and jalapeño until soft and golden. Stir in garlic, fresh diced tomatoes, and tomato paste. Let it cook down for 5 minutes.

  4. Simmer it all together:
    Add the fire-roasted tomatoes, corn, black beans, cumin, coriander, cayenne (if using), oregano, and reserved fajita broth. Stir to combine, then return the seared flank steak to the pot.

  5. Let it thicken:
    Simmer uncovered for 45–60 minutes, stirring occasionally, until the chili is rich, thick, and the steak is tender. Taste and adjust salt as needed. Finish with a squeeze of lime juice.

  6. Serve and top:
    Ladle into bowls and top with fresh cilantro, tajin kissed avocado, cheese, or tortilla strips for added crunch.


Pro Tips / Notes

  • Flank steak works beautifully for this recipe because of its bold flavor and tender texture when cooked properly. Slice against the grain for maximum tenderness.

  • The fajita broth adds a smoky, deeply savory base that elevates this chili far beyond your average pot.

  • Want more heat? Add a chipotle pepper in adobo during the simmer step for smoky spice.


Nutritional Estimates (per serving)

Estimates based on 6 servings
Calories: 420 | Protein: 35g | Carbs: 24g | Fat: 22g | Fiber: 6g


This Tex-Mex Flank Steak Chili is a celebration of layered flavor—hearty and thick with tender steak, smoky spices, and pops of fresh ingredients like corn and tomato. Whether you're feeding a hungry crowd or just cooking up some comfort for yourself, it’s a bold, unforgettable twist on classic chili. Best part? It’s just as good the next day—if there’s any left

Baked Cheetos Jalapeno Popper Mac


    Creamy, cheesy, spicy, and a little wild—this baked mac takes boxed Jalapeño Cheetos Mac & Cheese and transforms it into a loaded jalapeño popper-style casserole. We’re talking layers of cream cheese, sautéed peppers, onions, and a golden pepper jack–panko crust. It’s party food, comfort food, and childhood nostalgia all baked into one irresistible bite.


Ingredients

Base:

  • 1 box Jalapeño Cheetos Mac & Cheese, prepared to box directions

  • 1 tbsp butter or oil (for sautéing)

  • 1/2 small yellow onion, diced

  • 1–2 fresh jalapeños or bell peppers, diced (adjust to heat preference)

  • 1 clove garlic, minced

Creamy Cheese Sauce:

  • 4 oz cream cheese

  • 1/4 cup milk (or more, as needed for smooth texture)

  • 1/2 tsp smoked paprika

  • 1/4 tsp black pepper

  • Pinch of salt

Topping:

  • 1/2 cup shredded pepper jack

  • 1/3 cup panko breadcrumbs

  • 1 tbsp olive oil or melted butter

  • Optional: 1 tbsp chopped fresh parsley or green onion for garnish


Instructions

  1. Preheat your oven to 375°F (190°C). Grease a small baking dish (about 8x8").

  2. Cook the Cheetos mac according to the package. Set aside.

  3. In a skillet over medium heat, sauté onions and peppers in butter or oil until softened and fragrant—about 4–5 minutes. Add garlic and cook 1 minute more.

  4. Reduce heat to low and stir in cream cheese, milk, smoked paprika, black pepper, and a pinch of salt. Stir until it’s smooth and creamy—add more milk if needed to thin slightly.

  5. Combine the cheese sauce with the cooked mac and cheese, stirring in the sautéed veggies as well. Pour into your prepared baking dish.

  6. Top with shredded pepper jack. In a small bowl, mix panko with olive oil or melted butter, then sprinkle evenly on top.

  7. Bake uncovered for 18–20 minutes, or until hot and bubbling, with the top golden brown.

  8. Optional: Broil for 1–2 minutes at the end for extra crunch. Let cool slightly before serving, then garnish with chopped herbs if desired.


Pro Tips & Notes

  • For extra heat, leave some jalapeño seeds in or mix in a dash of cayenne with the cheese sauce.

  • For extra richness, stir in a spoonful of sour cream or Greek yogurt to the sauce.

  • Want to go wild? Crumble bacon over the top before baking—it’ll taste like a jalapeño popper explosion, and/or roughly crushed Jalapeno/Flamin' Hot Cheetos!!!


Nutritional Estimate (per serving, serves 4):

  • Calories: ~420

  • Protein: 13g

  • Carbs: 38g

  • Fat: 24g

  • Fiber: 2g

  • Sodium: ~780mg

These values will vary based on your final cheese and pepper choices.


This isn’t just boxed mac with extras—it’s a full-on flavor bomb that borrows the best of bar food and weeknight comfort. By layering heat, creaminess, and a golden topping, you’ve got something snacky and shareable that still feels homemade. Whether you’re trying to impress at a potluck or just want to take your late-night mac to the next level, this Jalapeño Popper Mac delivers.

Tuesday, April 8, 2025

Monthly Recipes & Posts: