Search Recipes & Posts:

Showing posts with label Sandwiches & Combos. Show all posts

Monday, June 30, 2025

Bourbon-Glazed Fried Chicken Hoecake


We're back with another hoecake masterpiece! This time, crispy fried chicken meets a rich, savory bourbon glaze, all served on a classic cornmeal hoecake for a true taste of the Bluegrass. Move over, chicken & waffles!


Well, it seems I have a problem. After creating the Hot Brown Hoecake to satisfy my craving from missing Lexington's Hoecake Festival, I thought I'd be content. I had successfully paid homage to a Kentucky legend by putting it on a foundation of pure Appalachian tradition. But then a new thought crept in: why stop at one? If one "Kentucky-on-top-of-Kentucky" dish was that good, what other paths could we travel down?

That first recipe was about decadent, savory, creamy comfort. This one... this one is for the other side of the Southern flavor coin. It's for the folks who love that irresistible dance of salty, sweet, and savory that you find in a perfect plate of chicken and waffles. But, in our ongoing mission to keep things as authentically Bluegrass as possible, we're once again swapping the waffle for its more rustic, cornmeal-based cousin.

Welcome to the next level: Bourbon-Glazed Fried Chicken on a Hoecake.

This isn't just a gimmick; it's an upgrade. A great hoecake offers a slightly crisp, buttery edge and a tender, corn-kissed center that a waffle just can't replicate. It’s the perfect sturdy, savory base for a piece of perfectly fried chicken—a crispy, craggy crust giving way to juicy, tender meat.

But the true star, the element that ties it all together and makes it undeniably Kentuckian, is the glaze. We're not just pouring maple syrup on this. We’re creating a rich, complex KY Bourbon and brown sugar glaze. It’s got the deep, oaky notes of good Kentucky bourbon, the molasses sweetness of brown sugar, a savory touch from a little soy sauce, and a gentle kick of cayenne to keep things interesting. It reduces into a beautiful, glossy sauce that coats every nook and cranny of that fried chicken.

So here you have it: a choice. A fork in the road of Kentucky comfort food. Do you take the path of creamy, cheesy, broiled decadence with the Hot Brown Hoecake, or do you venture down this road of crispy, salty, sweet-and-savory perfection? Either way, you're getting a true taste of home.

The Recipe

Yields: 4 servings Prep time: 20 minutes (+ 1 hour marinating time for chicken) Cook time: 30 minutes

Ingredients:

For the Fried Chicken:

  • 4 boneless, skinless chicken thighs or breasts, pounded to even thickness

  • 1 cup buttermilk

  • 1 tsp hot sauce

  • 1 cup all-purpose flour

  • 1 tsp salt

  • 1 tsp black pepper

  • 1 tsp paprika

  • 1/2 tsp garlic powder

  • Vegetable oil, for frying

For the Hoecakes:

  • 1 cup yellow cornmeal

  • 1/2 cup all-purpose flour

  • 1 tsp baking powder

  • 1/2 tsp salt

  • 1 large egg, beaten

  • 1 cup buttermilk

  • 2 tbsp unsalted butter, melted, plus more for frying

For the Bourbon & Brown Sugar Glaze:

  • 1/2 cup good Kentucky bourbon

  • 1/2 cup packed brown sugar

  • 2 tbsp soy sauce

  • 1 tbsp apple cider vinegar

  • 1/4 tsp cayenne pepper

Instructions:

  1. Marinate the Chicken: In a bowl, whisk together 1 cup of buttermilk and the hot sauce. Add the chicken pieces, ensuring they are fully submerged. Cover and refrigerate for at least 1 hour, or up to 4 hours.

  2. Prepare the Hoecake Batter: While the chicken marinates, make the batter. In a bowl, whisk the cornmeal, flour, baking powder, and salt. In a separate bowl, whisk the egg, 1 cup of buttermilk, and 2 tbsp of melted butter. Pour the wet into the dry and stir until just combined. Let the batter rest.

  3. Make the Bourbon Glaze: In a small saucepan, combine the bourbon, brown sugar, soy sauce, apple cider vinegar, and cayenne pepper. Bring to a simmer over medium heat, stirring until the sugar dissolves. Let it bubble gently for 5-7 minutes, until it has thickened enough to coat a spoon. Set aside.

  4. Dredge the Chicken: In a shallow dish, whisk together the flour, salt, pepper, paprika, and garlic powder. Remove the chicken from the buttermilk marinade, letting the excess drip off. Dredge each piece thoroughly in the flour mixture, pressing to ensure a thick coating.

  5. Fry the Chicken: Pour about an inch of vegetable oil into a large, heavy skillet (cast iron is perfect). Heat over medium-high heat to about 350°F (175°C). Carefully place the chicken in the hot oil, ensuring not to crowd the pan. Fry for 4-6 minutes per side, until golden brown, crispy, and cooked through. Transfer to a wire rack to drain.

  6. Cook the Hoecakes: While the chicken rests, cook the hoecakes in a separate skillet or griddle with melted butter over medium heat, using about 1/4 cup of batter for each. Cook for 2-3 minutes per side until golden.

  7. Assemble and Serve: Place a warm hoecake on each plate. Top with a piece of crispy fried chicken. Generously drizzle the warm bourbon glaze over the chicken, letting it soak into the hoecake. Serve immediately.

Nutritional Estimate (per serving):

  • Calories: ~900 kcal

  • Protein: ~45g

  • Fat: ~40g

  • Carbohydrates: ~80g


There you have it—another tribute to the flavors that make our home state so special. This dish is everything I love about Southern food: it's a little bit rustic, a little bit indulgent, and a whole lot of delicious. Whether you made our Hot Brown Hoecake or you're starting here, you're continuing a tradition of turning simple, honest ingredients into something truly memorable. I can't wait to see which path you choose. Enjoy!

Kentucky Hot Brown Hoecake


A legendary Kentucky sandwich meets its cornmeal soulmate. We've replaced the traditional toast with a savory, crisp-edged hoecake, creating the ultimate Bluegrass comfort dish.


There’s a specific kind of melancholy that comes from missing out on a great local event. This past weekend, as downtown Lexington was alive with the sizzle of batter on hot griddles for the annual Hoecake Festival, I was stuck watching from the sidelines of my social media feed. I could almost smell the cornmeal crisping up, hear the buzz of the crowd, and feel that unique sense of community that comes from celebrating something simple and deeply Kentuckian.

The hoecake is more than just a cornmeal pancake; it's a piece of our history. The story goes that these simple cakes got their name from being cooked on the blade of a field hoe held over an open fire. They represent a tradition of making something hearty and delicious from the most basic, fundamental ingredients of the land: cornmeal, water or buttermilk, and a little salt. It’s a testament to Appalachian resourcefulness and a direct culinary link to the agricultural backbone of our state. Seeing our city celebrate that history with a whole festival is a beautiful thing, and missing it left me wanting to connect with that heritage in my own way.

So, I found myself in the kitchen, thinking about how to pay proper homage. My mind wandered from one Kentucky classic to another, and that’s when the idea struck. What if I took our most humble culinary staple, the hoecake, and introduced it to our most famously decadent one? What if the simple, sturdy hoecake could provide a new foundation for the legendary Hot Brown?

The traditional Hot Brown, born at the Brown Hotel in Louisville, is a masterpiece of richness, served on simple toast points. But swapping that toast for a savory, buttermilk hoecake with crispy, buttery edges felt like a revelation. The hoecake provides not just a base, but a textural and flavorful upgrade, with the nutty sweetness of cornmeal ready to soak up every drop of that glorious Mornay sauce.

This isn't just a fusion recipe; it's a conversation between two icons of Kentucky cuisine. It’s the dish I made to turn my festival FOMO into a brand new tradition. It’s rich, it’s over-the-top, and it is unapologetically Kentuckian.

The Curry Chicken Naan-wich


A flavor-packed masterpiece featuring tender, spiced chicken, sweet caramelized onions and peppers, and a creamy, vibrant curry aioli, all hugged by warm, pillowy naan.


There are sandwiches, and then there are experiences. This, my friends, is an experience. We’ve been on a journey here at the blog, pushing the boundaries of what a simple meal can be. The idea of using naan as sandwich bread isn’t just a novelty; it’s a revelation. It transforms the familiar into something exciting and new, and today, we’re diving headfirst into the deep end of flavor with a creation that is pure, unadulterated comfort and joy: The Ultimate Curry Chicken Naan-wich.

This recipe was born from a craving for something that hit all the right notes—savory, sweet, spicy, and creamy. I wanted the robust, aromatic spices of my favorite Indian dishes but in a format that was easy to hold, perfect for a casual weeknight dinner or a weekend lunch that feels truly special. We’re not just making a sandwich; we’re engineering a perfect bite.

It all starts with the heart of the dish: the chicken. We’re taking tender chicken thighs, the undisputed champion of flavor and moisture, and giving them a serious flavor bath in a blend of classic Indian spices. Cumin, coriander, turmeric, and a touch of garam masala create a warm, earthy, and fragrant crust as the chicken sautés. We throw sliced onions and bell peppers into that same pan, letting them soften and sweeten, soaking up all the delicious seasoned goodness left behind by the chicken. The kitchen will smell absolutely divine, a promise of the deliciousness to come.

But what’s a hero without its trusty sidekick? The soul of this naan-wich, the element that ties everything together, is the curry aioli. And let me tell you, this is no wallflower. We’re creating a bold, vibrant sauce that sings with curry flavor. It’s creamy, it’s garlicky, with a bright kick from fresh lime juice that cuts through the richness. It’s the kind of sauce you’ll want to put on everything, but here, generously slathered on warm, soft naan, it finds its true calling.

Assembling this beauty is a joy in itself. You take a piece of warm, pillowy naan, still soft and pliable. You spread that golden curry aioli from edge to edge. Then you pile on the spiced chicken and the glistening, caramelized onions and peppers. Fold it over, and you’re holding something truly magical. The first bite is a symphony of textures and tastes—the soft chew of the naan, the tender, spiced meat, the sweetness of the vegetables, and the creamy, punchy aioli that wraps it all in a warm embrace. It’s a little messy, completely satisfying, and a dish that will have you immediately planning when you can make it again.

The Recipe

Yields: 4 servings Prep time: 15 minutes Cook time: 20 minutes

Ingredients:

For the Spiced Chicken & Peppers:

  • 1.5 lbs boneless, skinless chicken thighs, cut into bite-sized pieces

  • 1 tbsp olive oil

  • 1 large yellow onion, thinly sliced

  • 1 large bell pepper (any color), thinly sliced

  • 1 tbsp ground cumin

  • 1 tbsp ground coriander

  • 1 tsp turmeric powder

  • 1 tsp garam masala

  • 1/2 tsp chili powder (or more, to taste)

  • 1 tsp salt

  • 1/2 tsp black pepper

For the Curry Aioli:

  • 1 cup high-quality mayonnaise

  • 2 tbsp curry powder (a good quality one, like Madras)

  • 2 cloves garlic, minced or pressed

  • 1 tbsp fresh lime juice

  • 1/2 tsp cayenne pepper (optional, for extra heat)

  • Salt to taste

For Assembly:

  • 4 large pieces of plain or garlic naan

Instructions:

  1. Prepare the Aioli: In a small bowl, combine the mayonnaise, curry powder, minced garlic, lime juice, and optional cayenne pepper. Whisk until smooth and fully incorporated. Taste and add a pinch of salt if needed. Set aside in the refrigerator to let the flavors meld. This can be made an hour or two ahead for even better flavor.

  2. Season the Chicken: In a medium bowl, add the chicken pieces. Sprinkle with the cumin, coriander, turmeric, garam masala, chili powder, salt, and black pepper. Toss well until every piece of chicken is evenly coated in the spice mixture.

  3. Sauté the Vegetables: Heat the olive oil in a large skillet or pan over medium-high heat. Add the sliced onions and bell peppers. Sauté for 5-7 minutes, stirring occasionally, until they have softened and started to get some color. Remove the vegetables from the skillet and set them aside.

  4. Cook the Chicken: Using the same skillet, add the seasoned chicken to the hot pan. Cook for 6-8 minutes, stirring occasionally, until the chicken is cooked through and nicely browned on all sides. Return the sautéed onions and peppers to the skillet and toss everything together to combine. Remove from heat.

  5. Assemble the Naan-wiches: Warm the naan bread according to package directions (a few minutes in the oven or a hot, dry skillet works perfectly). Cut each warm naan in half. Generously spread the curry aioli on the inside of each naan half.

  6. Serve: Divide the hot chicken and pepper mixture evenly among the four naan halves. Fold, serve immediately, and enjoy the delicious mess.

Nutritional Estimate (per serving):

  • Calories: ~750 kcal

  • Protein: ~45g

  • Fat: ~40g

  • Carbohydrates: ~50g


This naan-wich is more than just a meal; it’s a testament to the fact that the best food often comes from coloring outside the lines. It’s a fusion of cultures and ideas, resulting in something that feels both new and deeply familiar. It respects the bold flavors of Indian cuisine while delivering them in the universally loved format of a handheld sandwich.

Making this dish is about having fun in the kitchen and creating something that will genuinely make people happy. It’s a perfect centerpiece for a casual get-together with friends or a way to break the monotony of the weekly dinner routine. It’s proof that with a little creativity, you can turn simple ingredients into an unforgettable feast. So go ahead, give it a try. Get your hands a little messy. I promise, it’s worth it. You’ll be adding this one to your regular rotation in no time.

You can swap out the bell peppers for lettuce (or add it), and the same can be said for fresh sliced tomatoes- this makes for an awesome sandwich any way you cut it!

The "Samosa Smash" Naan-wich


Your New Obsession for Global Comfort

Forget everything you thought you knew about sandwiches, because the "Samosa Smash" Naan-wich is about to become your new obsession. Imagine the comforting, savory heart of your favorite Indian samosa—tender, spiced potatoes and peas—transformed into a crispy, golden patty. Now, picture that nestled inside warm, pillowy naan, slathered with a zesty, creamy Curry Lime Aioli, and brightened with tangy quick-pickled onions and fresh herbs. This isn't just a meal; it's a vibrant, textural, and utterly unique experience where classic Indian flavors meet modern sandwich genius. It’s perfect for a quick yet substantial lunch, or as a fun, thoughtful dinner that’s guaranteed to impress.

You know how much I love finding those dishes that spark joy and curiosity, something that makes you say, "Wow, I didn't know I needed this!" (Read closing to understand!) That's exactly how I feel about this "Samosa Smash." We're taking inspiration from a beloved classic, the samosa, and completely reimagining it. Instead of a pastry shell, we’re focusing on that incredible spiced potato and pea filling, turning it into a substantial patty that gets wonderfully crisp when pan-fried. It’s a delicious way to give a familiar flavor a whole new texture and presence.

The foundation of this Naan-wich starts with our homemade Curry Lime Aioli. It’s the perfect creamy, tangy, and subtly spiced spread that truly ties all the flavors together. Making it is a breeze, and it’s miles beyond anything you’d get from a bottle, adding that fresh, vibrant kick. Then, we prepare our "samosa smash" patties. This is where the magic happens—we're talking about perfectly seasoned potatoes and peas, cooked down with warm Indian spices like cumin, turmeric, and a hint of chili, then gently mashed and formed into patties. A quick pan-fry gives them that irresistible golden crust and a tender, flavorful interior.

But it doesn't stop there. To cut through the richness and add a delightful crunch, we're making quick-pickled red onions infused with a touch of Indian spice. These bright, tangy slivers are the perfect counterpoint to the savory patty. And finally, a fresh mint-cilantro drizzle provides that essential burst of herbaceous freshness, just like a cooling chutney.

Assembling it is pure joy: warm, soft naan, a generous smear of the Curry Lime Aioli, the crispy Samosa Smash patty, a scattering of those tangy pickled onions, and a final flourish of the fresh herb drizzle. Every bite is a symphony of textures and flavors: the chewiness of the naan, the crisp exterior and soft interior of the patty, the zing of the aioli and pickled onions, and the fresh notes of cilantro and mint. It truly feels good to create (and devour!) something so unexpectedly delicious.

This "Samosa Smash" Naan-wich is a testament to the fact that culinary creativity knows no bounds. It’s a dish that embodies "Edible Intelligence"—taking familiar components and reassembling them into something entirely new and exciting. Get ready to fall in love with this unique take on Indian comfort food.


The "Samosa Smash" Naan-wich

Yields: 4 Naan-wiches Prep time: 30 minutes (plus chilling time for patties) Cook time: 25-30 minutes

Ingredients:

For the Samosa Smash Patties:

  • 1 tbsp olive oil or neutral cooking oil

  • 1 tsp cumin seeds

  • 1/2 large yellow onion, finely diced

  • 1 inch fresh ginger, grated

  • 2 cloves garlic, minced

  • 1/2 cup frozen peas

  • 1/2 tsp ground turmeric

  • 1/2 tsp garam masala

  • 1/4 tsp red chili powder (or to taste)

  • 2 large potatoes (about 1 lb), boiled and mashed (or finely diced and steamed until tender)

  • Salt to taste

  • 2 tbsp chopped fresh cilantro, plus more for garnish

  • 2 tbsp vegetable oil (for pan-frying patties)

For the Curry Lime Aioli:

  • 1/2 cup mayonnaise (full-fat recommended) - (Or Veg/Vegan Mayo!)

  • 1 tbsp fresh lime juice

  • 1/2 tsp curry powder (mild or medium)

  • 1/4 tsp garlic powder

  • Pinch of salt

For the Quick-Pickled Red Onions:

  • 1/2 small red onion, thinly sliced

  • 1/4 cup white vinegar

  • 1/4 cup hot water

  • 1/2 tsp sugar

  • Pinch of salt

  • Pinch of red chili flakes (optional)

For Assembly:

  • 4 pieces naan bread

  • Fresh mint and cilantro for garnish/drizzle

Equipment:

  • Large skillet

  • Mixing bowls

  • Fork or potato masher

Instructions:

  1. Prepare Quick-Pickled Red Onions: In a small bowl, combine sliced red onion, white vinegar, hot water, sugar, salt, and chili flakes (if using). Stir well and set aside to pickle while you prepare other components.

  2. Make Samosa Smash Filling: Heat 1 tbsp olive oil in a large skillet over medium heat. Add cumin seeds and let them sizzle for 30 seconds until fragrant. Add diced onion and cook until softened, about 5 minutes. Stir in grated ginger and minced garlic, cook for 1 minute more until fragrant. Add frozen peas, ground turmeric, garam masala, and red chili powder. Cook for 2-3 minutes, stirring, until spices are fragrant.

  3. Form Patties: Add the mashed potatoes to the skillet with the spiced pea mixture. Season with salt. Mash everything together until well combined. Stir in 2 tbsp fresh cilantro. Let the mixture cool slightly. Form into 4 equal patties, about 3/4-inch thick. If time permits, chill patties for 15-20 minutes to help them firm up.

  4. Prepare Curry Lime Aioli: In a small bowl, whisk together mayonnaise, lime juice, curry powder, garlic powder, and a pinch of salt until smooth and well combined. Taste and adjust seasoning if needed.

  5. Pan-Fry Patties: Heat 2 tbsp vegetable oil in a large skillet over medium-high heat. Carefully add the patties and pan-fry for 4-6 minutes per side, until golden brown and crispy.

  6. Warm Naan: While patties cook, warm the naan bread according to package instructions (microwave, oven, or pan-fry lightly).

  7. Assemble Naan-wiches: Spread a generous layer of Curry Lime Aioli on each piece of warm naan. Place one crispy Samosa Smash patty in the center. Top with a spoonful of drained quick-pickled red onions.

  8. Garnish and Serve: Garnish with extra fresh cilantro and mint leaves. Serve immediately.


Nutritional Estimate (per Naan-wich, approximate, based on chicken breast and full-fat mayo for aioli):

  • Calories: 600-750 kcal (highly dependent on naan size/type and oil used for frying patties)

  • Protein: 15-20 grams

  • Fat: 30-45 grams

  • Carbohydrates: 60-80 grams

Note: These are estimated nutritional values based on standard ingredient data. Actual values may vary based on specific brands, exact measurements, type of potato, and the oil absorption during frying. Always consult official, authoritative nutritional databases for precise values if needed.


Hear us out - Sometime we get AI to come up with it's own spins on things and it definitely hit a weird mark, coming up with this one mostly on it's own. We were very impressed with the results, and they're a testament to creativity, use of culinary expertise and technology at Edible Intelligence. Enjoy this recipe that was designed by Gemini by Google - we do! (Understand all AI interactions, at least for the moment, are a team effort. Input=Output. Be polite to your AI!)

Sunday, June 15, 2025

Curry Chicken Wraps


    These wraps combine the rich flavors of Indian curry with the convenience of a handheld meal. Tender curry chicken is paired with fragrant rice pulao, fresh onions, and juicy tomatoes, all wrapped in warm naan bread for a satisfying and flavorful experience.

Aromatic Rice Pulao: The Perfect Base

Rice pulao, a fragrant and flavorful rice dish, forms the base of these wraps. It's typically made with basmati rice, aromatic spices, and sometimes vegetables, creating a delicious and complementary foundation for the curry chicken.

Curry Chicken: A Cornucopia of Spices

The curry chicken is the star of the show, offering a rich and complex flavor profile. A blend of aromatic spices, often including cumin, coriander, turmeric, and garam masala, creates a warm and inviting curry sauce that coats the tender chicken.

Chicken Florentine Quesadilla


This recipe combines the creamy, comforting flavors of chicken Florentine with the ease and portability of a quesadilla. Spinach tortillas enclose a delicious filling of chicken, spinach, artichoke, and cheese, creating a satisfying and flavorful meal.

A Florentine Twist on a Classic

    Chicken Florentine - a dish typically featuring chicken cooked in a creamy spinach sauce. This quesadilla adaptation captures those key flavors, making it a fun and accessible way to enjoy a classic. The spinach tortillas complement the filling, adding an extra layer of flavor and visual appeal.   

Sunday, May 25, 2025

Kentucky Hot Brown Arancini


Kentucky Hot Brown Goes Gourmet: Crispy Arancini with a Smoky Kick!

Lexington, we all know and love the iconic Hot Brown – that gloriously cheesy, turkey-and-bacon-laden open-faced sandwich that's practically a Kentucky culinary monument. But what happens when we take those cherished flavors and give them a surprising, sophisticated twist? Prepare your taste buds for the Kentucky Hot Brown Arancini – crispy, golden risotto balls packed with the essence of our favorite dish, served with a smoky paprika aioli that'll make you say "yum" in a Bluegrass drawl!

Here in the heart of Kentucky, the Hot Brown isn't just food; it's a story, a tradition, a warm embrace on a plate. That creamy Mornay sauce, the tender turkey, the salty bacon, all layered on toasted bread – it’s pure comfort. But at "Edible Intelligence," we love to play with ideas, to explore new ways to experience familiar flavors.

That's where the inspiration for these delightful arancini came from. Imagine taking all the heart and soul of a Hot Brown and encasing it in a perfectly cooked, Parmesan-rich risotto, then frying it to a golden crisp. Each bite delivers that familiar combination of turkey, a hint of cheesy Mornay (woven right into the risotto!), and the satisfying crunch of the fried exterior, all enhanced by a luscious, homemade smoked paprika aioli for dipping.

These aren't your average fried rice balls. They're a little bite of Kentucky heritage, reimagined for a modern palate. They're perfect as a unique appetizer for your next gathering, a surprising starter for a special meal, or even just a fun weekend project for the adventurous home cook.

Why will you love these Hot Brown Arancini?

  • Familiar Flavors, New Form: All the taste of a Hot Brown in an elegant, handheld bite.
  • Crispy Perfection: The golden-fried panko crust gives way to a creamy, flavorful interior.
  • Smoky & Savory Dip: The smoked paprika aioli adds a delightful counterpoint and an extra layer of flavor.
  • A Conversation Starter: These are guaranteed to get your guests talking (and asking for the recipe!).

Ready to take a delicious dive into this creative Kentucky-inspired appetizer? Let's get cooking!


Kentucky Hot Brown Arancini with Smoked Paprika Aioli

Crispy, golden risotto balls filled with turkey and bacon, infused with the essence of a Hot Brown, served with a flavorful smoked paprika aioli.

Yields: Approximately 18-20 arancini Prep time: 45 minutes (plus risotto cooling time) Cook time: 30 minutes

Ingredients:

For the Risotto:

  • 6 cups chicken or turkey broth
  • 2 tablespoons olive oil
  • 1 small yellow onion, finely chopped
  • 2 cloves garlic, minced
  • 1 ½ cups Arborio rice
  • ½ cup dry white wine (optional)
  • ¾ cup grated Parmesan cheese, plus more for filling
  • ¼ cup grated Gruyère cheese
  • ¼ teaspoon freshly grated nutmeg
  • Salt and freshly ground black pepper to taste

For the Filling:

  • 1 ½ cups cooked turkey breast, finely diced
  • 6 slices bacon, cooked until crispy and crumbled
  • 2 tablespoons chopped fresh parsley (optional)
  • Small dice of tomato (seeds removed, optional, about ¼ cup)

For Coating & Frying:

  • 1 cup all-purpose flour
  • 3 large eggs, lightly beaten
  • 2 cups panko breadcrumbs
  • Vegetable oil, for frying (about 3-4 inches deep)

For the Smoked Paprika Aioli:

  • 1 cup good quality mayonnaise
  • 2 cloves garlic, minced (or 1 small roasted garlic clove, mashed)
  • 1 tablespoon sweet smoked paprika
  • ½ teaspoon hot smoked paprika (adjust to your spice preference)
  • 1 tablespoon fresh lemon juice
  • Pinch of salt
  • Freshly ground black pepper to taste

Instructions:

1. Make the Risotto: * In a saucepan, bring the broth to a simmer and keep warm over low heat. * In a large, heavy-bottomed pot or Dutch oven, heat olive oil over medium heat. Add onion and cook until softened, about 5 minutes. Add garlic and cook for 1 minute more until fragrant. * Add Arborio rice and toast for 2-3 minutes, stirring constantly, until the grains are translucent around the edges. * If using, pour in white wine and cook, stirring, until absorbed. * Add a ladleful of warm broth to the rice, stirring continuously until the liquid is absorbed. Continue adding broth, one ladleful at a time, stirring constantly and allowing each addition to be absorbed before adding the next, until the rice is creamy and al dente (about 20-25 minutes). * Stir in the grated Parmesan and Gruyère cheeses, nutmeg, salt, and pepper. Taste and adjust seasoning. * Spread the risotto in a thin layer on a baking sheet to cool quickly. Once slightly cooled, cover with plastic wrap directly on the surface and refrigerate for at least 2 hours, or preferably overnight, until completely firm.

2. Prepare the Filling: * In a bowl, gently combine the diced cooked turkey, crumbled bacon, optional parsley, and optional diced tomato.

3. Form the Arancini: * Take about 2-3 tablespoons of the chilled risotto in your hand. Flatten it slightly and make a well in the center. * Place about 1 teaspoon of the turkey and bacon mixture (and a tiny pinch more grated Parmesan if desired) into the well. * Gently bring the risotto around the filling, shaping it into a ball about 1 ½ - 2 inches in diameter. Make sure the filling is completely enclosed. * Repeat with the remaining risotto and filling.

4. Set Up for Frying: * Place flour in one shallow dish, beaten eggs in another, and panko breadcrumbs in a third. * Dredge each arancino in flour, then dip in the egg, and finally coat thoroughly with panko breadcrumbs, pressing gently to adhere. Place the breaded arancini on a clean plate or baking sheet.

5. Fry the Arancini: * Pour vegetable oil into a deep, heavy-bottomed pot or Dutch oven until it reaches about 3-4 inches in depth. Heat the oil over medium-high heat until it reaches 350°F (175°C) on a deep-fry thermometer. * Carefully add the arancini to the hot oil in batches (do not overcrowd the pot). Fry for 3-5 minutes, turning occasionally, until they are golden brown and heated through. * Remove the fried arancini with a slotted spoon and drain on a wire rack lined with paper towels.

6. Make the Smoked Paprika Aioli: * In a small bowl, whisk together the mayonnaise, minced (or mashed roasted) garlic, sweet and hot smoked paprika, and lemon juice. Season with salt and pepper to taste. Cover and refrigerate until ready to serve.

7. Serve: * Serve the Kentucky Hot Brown Arancini hot, with the smoked paprika aioli on the side for dipping. Garnish with a sprinkle of fresh parsley if desired.

Nutritional Estimate (per 2 arancini, approximate):

  • Calories: 300-400 (depending on size and filling)
  • Protein: 15-20g
  • Fat: 15-20g
  • Carbohydrates: 30-40g

(Note: This is an estimate and will vary based on specific ingredient amounts and frying time.)


A Little Bite of Kentucky, Elevated

These Kentucky Hot Brown Arancini are a playful and delicious way to experience the iconic flavors of our beloved Hot Brown in a brand-new, appetizer-friendly format. The crispy exterior, the creamy, cheesy interior with its savory turkey and bacon surprises, and that smoky aioli – it’s a combination that’s sure to impress and delight. So go ahead, bring a little bit of Kentucky gourmet to your table!

Thursday, May 22, 2025

Torch-Kissed Open-Face Tuna Melt

Forget any preconceived notions of a simple tuna melt. We're taking this beloved comfort food classic and elevating it to an art form. Imagine: a perfectly crafted tuna salad, where finely diced hard-boiled egg and crisp celery offer an irresistible textural counterpoint in every bite. This flavorful foundation is generously topped with piquant onions, savory black olives, and tangy banana peppers, all enrobed in a blanket of the perfect melting cheese. And for the grand finale? A kiss from a culinary torch, creating those beautifully blistered, golden-brown cheesy peaks that promise an unforgettable crunch and gooey pull. This isn't just a sandwich; it's an experience.

Crafting an Icon: The Journey to the Perfect Melt

My quest began with a simple desire: to create the ultimate tuna melt, one where every element was considered and perfected. I knew texture would be paramount. No chunky, uneven bits here! The hard-boiled eggs and celery had to be "perfectly diced" – small, uniform pieces that would meld seamlessly into the creamy tuna salad, providing a subtle, satisfying crunch without overpowering.

Then came the toppings. The bite of thinly sliced onion, the salty punch of black olives, and the zesty kick of banana peppers – a trio designed to dance with the richness of the tuna and cheese. Speaking of cheese, the choice was crucial. It needed to melt beautifully, creating that luscious, molten lava effect, but also contribute a distinct, delicious flavor. A good quality sharp cheddar won my heart for its robust taste and excellent melting properties, though a nutty Gruyère also makes a stunning appearance.

The base? A sturdy slice of artisan bread, toasted just enough to hold its own against the generous toppings. And the pièce de résistance – the culinary torch. While a broiler does an admirable job of melting the cheese, the torch adds that extra "wow" factor, that "soufflé" effect, blistering the cheese in spots for a truly gourmet presentation and an added layer of smoky char. The sizzle and aroma as the flame kisses the cheese is a little bit of kitchen theatre that makes the first bite all the more rewarding. This open-face tuna melt is a testament to how a few thoughtful details can transform the familiar into something truly special.


Recipe: The Ultimate Torch-Kissed Open-Face Tuna Melt

Yields: 2 open-face melts Prep time: 20 minutes Cook time: 5-8 minutes

Ingredients:

For the Perfect Tuna Salad:

  • 1 can (5-6 oz) solid white albacore tuna, packed in water or oil, thoroughly drained
  • 2 hard-boiled eggs, cooled and perfectly diced (about ¼-inch dice)
  • 1 large celery stalk, perfectly diced (about ¼-inch dice)
  • ¼ cup mayonnaise (good quality)
  • 1 tbsp finely chopped red onion (optional, for extra zing in the salad)
  • 1 tsp Dijon mustard
  • Salt and freshly ground black pepper to taste
  • A squeeze of fresh lemon juice (optional, for brightness)

For Assembling the Melt:

  • 2 thick slices of sturdy bread (e.g., sourdough, artisan white, rye, or ciabatta cut lengthwise)
  • ½ cup thinly sliced yellow or red onion
  • ¼ cup sliced black olives
  • ¼ cup sliced pickled banana peppers
  • 4-6 oz (1 to 1 ½ cups shredded) Perfect Melting Cheese:
    • Primary Recommendation: Sharp Cheddar, freshly shredded
    • Excellent Alternative: Gruyère, freshly shredded
    • (A blend of Monterey Jack with either of the above also works wonderfully for extra meltiness)

Equipment:

  • Baking sheet
  • Culinary torch (soufflé torch) - optional but recommended for full effect

Instructions:

1. Prepare the Hard-Boiled Eggs: * Place eggs in a saucepan and cover with cold water by about an inch. Bring to a rolling boil. Once boiling, cover the pan, remove from heat, and let stand for 10-12 minutes. * Immediately transfer eggs to an ice bath to cool completely. Peel and dice them into small, uniform ¼-inch pieces.

2. Make the Perfect Tuna Salad: * In a medium bowl, flake the thoroughly drained tuna with a fork. * Add the diced hard-boiled eggs, diced celery, mayonnaise, finely chopped red onion (if using), and Dijon mustard. * Mix gently until just combined. Be careful not to overmix, as you want to maintain some texture. * Season with salt, pepper, and a squeeze of lemon juice (if using) to taste.

3. Prepare for Assembly: * Preheat your oven's broiler to high. Position an oven rack about 6 inches from the heating element. * Lightly toast the bread slices on both sides until just golden. You can do this in a toaster or under the broiler for a minute or two per side (watch carefully!). Place toasted bread on a baking sheet.

4. Assemble the Open-Face Tuna Melts: * Divide the tuna salad evenly and spread it generously over each slice of toasted bread, going almost to the edges. * Layer the toppings: scatter the thinly sliced onions, sliced black olives, and sliced banana peppers over the tuna salad. * Generously cover the toppings with the shredded cheese, ensuring it extends over the other toppings to help bind them.

5. Broil the Melts: * Place the baking sheet with the assembled tuna melts under the preheated broiler. * Broil for 3-5 minutes, watching very carefully, until the cheese is fully melted, bubbly, and starting to get golden brown spots. Ovens vary, so timing can differ. The goal is melted and hot throughout.

6. The Torch-Kissed Finish (Optional): * Carefully remove the baking sheet from the oven. * If using a culinary torch, hold it a few inches from the surface of the melted cheese. Sweep the flame lightly and quickly across the cheese until you achieve your desired level of browning and blistering. This should only take 30 seconds to a minute. Work in a well-ventilated area and follow your torch's safety instructions.

7. Serve Immediately: * Let the melts sit for a minute before serving, as they will be very hot. Serve open-faced and enjoy the incredible textures and flavors.


Nutritional Estimate (per open-face melt, approximate):

  • Calories: 550-700 kcal (will vary significantly based on bread, amount of cheese, and tuna type)
  • Protein: 30-40g
  • Fat: 30-45g (Saturated Fat: 15-20g)
  • Carbohydrates: 30-40g
  • Sugar: 3-6g
  • Fiber: 2-4g
  • Sodium: 800-1200mg

Disclaimer: This is a rough estimate. Actual nutritional values will vary based on specific ingredients, brands, and portion sizes used.


Get ready to impress yourself and anyone lucky enough to share this with you! This isn't just lunch; it's a culinary statement. Enjoy the delicious journey of making and devouring this ultimate tuna melt.

Sunday, May 18, 2025

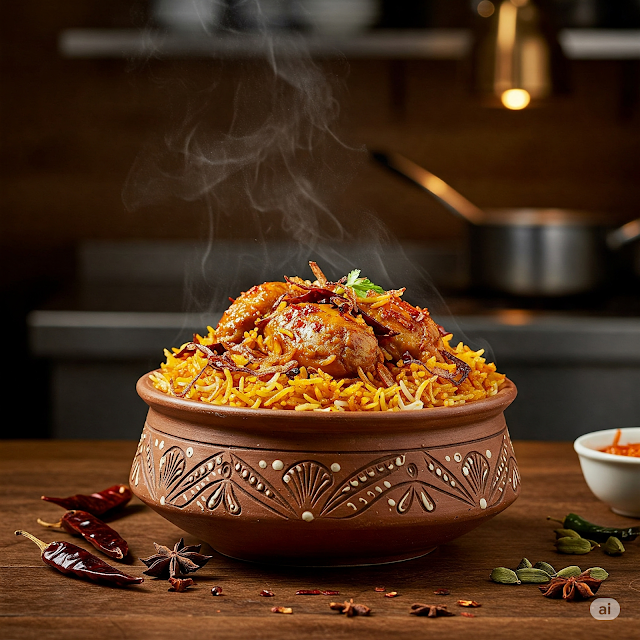
Szechuan Biryani


A Fiery Dance of Flavors

Imagine the aromatic allure of a traditional Indian biryani, with its fragrant basmati rice and tender, spiced meat, now imagine it infused with the bold, numbing, and spicy thrill of Szechuan cuisine. This Szechuan Phoenix Biryani is not just a meal; it's an experience – a culinary bridge between two ancient food cultures, reborn into something excitingly new. Get ready to ignite your taste buds!

From a Spark of Inspiration to a Culinary Inferno

This recipe was born from a late-night craving, a musing on how to elevate the beloved biryani into a new stratosphere of flavor. I’ve always adored the complexity of biryani, but sometimes I’ve longed for a bit more punch, a more assertive gravy to mingle with those beautiful grains of rice. Simultaneously, the captivating ma la (numbing and spicy) character of Szechuan food has always held a special place in my heart. What if, I thought, these two powerhouses could meet? Not just coexist, but truly meld, creating a dish that respects its origins while forging a bold new identity.

The challenge was to balance the fragrant, subtle spices of biryani – the cardamom, cloves, and cinnamon – with the assertive, fiery notes of Szechuan peppercorns, chili bean paste (doubanjiang), and dried chilies. The goal wasn't to let one cuisine overpower the other, but to create a harmonious explosion where every spoonful offers a journey. We're amping up the "curry" or the masala component, ensuring that the protein is enrobed in a rich, Szechuan-style sauce that generously coats the rice during the final dum cooking process.

Cooking this Szechuan Biryani is an adventure in itself. The kitchen fills with an intoxicating aroma – first, the warming scent of whole Indian spices, then the pungent, exciting fragrance of sizzling Szechuan peppercorns and chilies, followed by the savory depth of doubanjiang. As you layer the vibrant, jewel-toned rice with the rich, spicy meat mixture, dotted with crispy fried onions and fresh herbs, you know you're creating something truly special.

And the taste? It’s a revelation. The fluffy basmati rice, perfumed with saffron and whole spices, provides the perfect canvas for the tender, succulent meat that carries the signature Szechuan heat and a delightful numbing tingle. The savory, umami-rich sauce ties everything together, creating a complex, multi-layered flavor profile that will have you reaching for more. Each bite is a dance between the familiar comfort of biryani and the exhilarating thrill of Szechuan spice. It's a dish that's both bold and nuanced, fiery and fragrant.

Szechuan Phoenix Biryani: The Recipe

Yields: 6-8 servings Prep time: 45 minutes (plus 1-2 hours marination) Cook time: 1 hour 30 minutes

Ingredients:

For the Chicken Marinade:

  • 1.5 lbs (approx. 700g) boneless, skinless chicken thighs, cut into 2-inch pieces
  • 1 cup plain yogurt (full fat recommended)
  • 1 tablespoon ginger-garlic paste
  • 1 teaspoon turmeric powder
  • 1 teaspoon red chili powder (Kashmiri or a mild variety)
  • 1 tablespoon light soy sauce
  • 1 teaspoon toasted and ground Szechuan peppercorns
  • 1/2 teaspoon salt

For the Szechuan Gravy/Curry:

  • 3 tablespoons cooking oil (peanut or vegetable oil recommended)
  • 2-3 dried red chilies (adjust to your spice preference), broken in half
  • 1 tablespoon Szechuan peppercorns (whole)
  • 1 large onion, finely chopped
  • 1 tablespoon ginger-garlic paste
  • 2-3 tablespoons chili bean paste (Doubanjiang – adjust to your spice preference and saltiness of brand)
  • 1 tablespoon light soy sauce
  • 1 teaspoon Chinkiang vinegar (or black rice vinegar)
  • 1/2 teaspoon sugar
  • 1 cup chicken broth or water
  • 1/2 cup chopped bell peppers (optional, for color and texture)
  • Salt to taste (be mindful of salt in soy sauce and doubanjiang)

For the Rice:

  • 2 cups aged Basmati rice
  • 4 cups water
  • 2-3 green cardamom pods
  • 2-3 cloves
  • 1-inch cinnamon stick
  • 1 bay leaf
  • 1 teaspoon salt
  • Optional: A pinch of saffron threads soaked in 2 tablespoons warm milk

For Layering & Garnish:

  • 1/2 cup crispy fried onions (store-bought or homemade)
  • 1/4 cup chopped fresh cilantro
  • 1/4 cup chopped fresh mint leaves
  • 1 tablespoon ghee or melted butter (for drizzling)
  • Extra toasted and ground Szechuan peppercorns for garnish (optional)

Equipment:

  • Large heavy-bottomed pot or Dutch oven with a tight-fitting lid

Process/Steps:

1. Marinate the Chicken: * In a large bowl, combine the chicken pieces with all the marinade ingredients: yogurt, ginger-garlic paste, turmeric powder, red chili powder, soy sauce, ground Szechuan peppercorns, and salt. * Mix well to ensure the chicken is thoroughly coated. * Cover and refrigerate for at least 1-2 hours, or preferably overnight for deeper flavor.

2. Prepare the Rice: * Rinse the basmati rice gently in cold water until the water runs mostly clear. Soak in fresh water for 30 minutes. * Drain the soaked rice. * In a large pot, bring 4 cups of water to a boil. Add the green cardamom pods, cloves, cinnamon stick, bay leaf, and 1 teaspoon of salt. * Add the drained rice to the boiling water. Cook for about 5-7 minutes, or until the rice is 70% cooked (it should still have a slight bite). * Carefully drain the rice through a fine-mesh sieve and set aside. Discard the whole spices if you prefer, or leave some in for visual appeal.

3. Cook the Szechuan Chicken Gravy: * Heat the cooking oil in your heavy-bottomed pot or Dutch oven over medium heat. * Once the oil is hot, add the dried red chilies and whole Szechuan peppercorns. Sauté for about 30-60 seconds until fragrant (be careful not to burn them). * Add the finely chopped onion and cook until softened and translucent, about 5-7 minutes. * Stir in the ginger-garlic paste and cook for another minute until fragrant. * Add the chili bean paste (Doubanjiang) and cook for 2-3 minutes, stirring constantly, until it darkens slightly and the oil starts to separate. This step is crucial for developing its flavor. * Add the marinated chicken to the pot. Increase the heat to medium-high and cook, stirring occasionally, until the chicken is lightly browned on all sides. * Stir in the light soy sauce, Chinkiang vinegar, and sugar. Mix well. * Pour in the chicken broth or water. Bring to a simmer. If using bell peppers, add them now. * Reduce the heat to low, cover, and let it simmer for 15-20 minutes, or until the chicken is cooked through and the gravy has thickened. Taste and adjust salt if necessary. The gravy should be rich and flavorful.

4. Assemble the Biryani (Layering): * Remove about half of the Szechuan chicken gravy from the pot and set it aside. Spread the remaining chicken and gravy evenly at the bottom of the pot. * Spread half of the par-cooked basmati rice evenly over the chicken layer. * Sprinkle half of the crispy fried onions, half of the chopped cilantro, and half of the chopped mint over the rice. * Spoon the reserved Szechuan chicken gravy evenly over this layer of rice and herbs. * Top with the remaining par-cooked rice, spreading it evenly. * Sprinkle the remaining crispy fried onions, cilantro, and mint on top. * If using saffron milk, drizzle it over the top layer of rice. * Drizzle the ghee or melted butter over the top.

5. Dum Cooking (Steaming): * Cover the pot with a tight-fitting lid. To ensure a good seal, you can wrap the edges of the lid with aluminum foil or use a traditional method of sealing the lid to the pot with atta (wheat flour) dough. * Cook on the lowest possible heat setting for 20-25 minutes. This slow steaming process allows the flavors to meld beautifully. * After 20-25 minutes, turn off the heat and let the biryani rest, still covered, for at least 10-15 minutes before opening.

6. Serving: * Gently fluff the biryani from the sides of the pot, trying to get a mix of rice and the chicken gravy in each serving. * Serve hot, garnished with a little extra toasted and ground Szechuan peppercorns if desired for an extra numbing kick. * This biryani is fantastic on its own or can be served with a cooling cucumber raita or a simple side salad to balance the spice.

Nutritional Estimate (per serving, approximate):

  • Calories: 550-700 kcal
  • Protein: 35-45g
  • Fat: 20-30g (will vary based on chicken cut and oil used)
  • Carbohydrates: 50-65g

Wednesday, May 14, 2025

Saffron & Cardamom Bean Burgers & Okra & Fetta Fritters

    This culinary adventure brings together the unexpected warmth of saffron and cardamom in a hearty black bean burger with the crispy, savory delight of charred okra and feta fritters. Served with a refreshing mango salsa and a zesty harissa yogurt dip, this meal is a symphony of flavors and textures that will tantalize your taste buds.

Saffron & Cardamom Infused Black Bean Burgers with Mango Salsa

Forget everything you thought you knew about black bean burgers. This recipe elevates the classic vegetarian staple with the exotic aromas of saffron and cardamom, spices more commonly found in rice dishes or desserts. The result is a burger that's both hearty and surprisingly fragrant, offering a unique and unforgettable flavor experience. The bright and refreshing mango salsa adds a touch of sweetness and acidity, perfectly balancing the warmth of the spices.

Ingredients:

  • For the Burgers:
    • 1 tablespoon olive oil
    • 1 onion, chopped
    • 2 cloves garlic, minced
    • 1 red bell pepper, chopped
    • 1 (15-ounce) can black beans, rinsed and drained  
    • 1/2 cup cooked quinoa or brown rice
    • 1/4 cup chopped cilantro
    • 1 egg, lightly beaten
    • 1/4 cup breadcrumbs
    • 1/4 teaspoon saffron threads, crushed
    • 1/4 teaspoon ground cardamom
    • 1/2 teaspoon cumin
    • 1/4 teaspoon smoked paprika
    • Salt and pepper to taste
  • For the Mango Salsa:
    • 1 ripe mango, diced
    • 1/2 red onion, finely chopped
    • 1/4 cup chopped cilantro
    • 1 jalapeno, seeded and minced (optional)
    • Juice of 1 lime
    • Salt to taste
  • For Serving:
    • Burger buns
    • Lettuce
    • Tomato slices

Instructions:

  1. Prepare the Burgers: Heat olive oil in a skillet over medium heat. Add onion and cook until softened, about 5 minutes. Add garlic and red bell pepper and cook for another 3 minutes.
  2. In a large bowl, mash the black beans with a fork. Add the cooked quinoa or brown rice, cilantro, egg, breadcrumbs, saffron, cardamom, cumin, smoked paprika, salt, and pepper. Mix well.
  3. Form the mixture into patties.
  4. Cook the burgers: You can either pan-fry them in a skillet over medium heat for about 5-7 minutes per side, or bake them in a preheated oven at 375°F (190°C) for about 20 minutes, flipping halfway through.
  5. Prepare the Mango Salsa: In a medium bowl, combine the diced mango, red onion, cilantro, jalapeno (if using), lime juice, and salt. Mix well.
  6. Assemble the Burgers: Serve the burgers on toasted buns with lettuce, tomato slices, and a generous topping of mango salsa.

Nutritional Estimate (per serving, based on 4 servings):

  • Calories: ~400-450 kcal
  • Protein: ~15-18g
  • Carbohydrates: ~60-70g
  • Fat: ~10-15g
  • Fiber: ~15-20g

Charred Okra & Feta Fritters with Harissa Yogurt Dip

These crispy fritters offer a unique combination of textures and flavors. The slightly charred okra provides a delightful earthy note, while the salty feta adds a creamy richness. The harissa-infused yogurt dip provides a cooling and spicy contrast, making these fritters a perfect appetizer or side dish.

Ingredients:

  • 1 pound fresh okra, trimmed
  • 1 cup crumbled feta cheese
  • 1/2 cup all-purpose flour
  • 1 egg, lightly beaten
  • 1/4 cup chopped fresh parsley
  • 1/4 teaspoon cumin
  • 1/4 teaspoon paprika
  • Salt and pepper to taste
  • Vegetable oil, for frying
  • For the Harissa Yogurt Dip:
    • 1 cup plain yogurt
    • 1-2 teaspoons harissa paste (or more, to taste)
    • 1 tablespoon lemon juice
    • 1 clove garlic, minced
    • Salt to taste

Instructions:

  1. Char the Okra: Preheat a grill or grill pan to medium-high heat. Grill the okra until slightly charred and tender, about 5-7 minutes. Let cool slightly and then chop.
  2. In a medium bowl, combine the chopped okra, feta cheese, flour, egg, parsley, cumin, paprika, salt, and pepper. Mix well.
  3. Heat about 1 inch of vegetable oil in a deep skillet or pot over medium-high heat until it reaches 350°F (175°C).
  4. Carefully drop spoonfuls of the okra mixture into the hot oil, being careful not to overcrowd the pan.
  5. Fry for 2-3 minutes per side, or until golden brown and crispy. Remove with a slotted spoon and drain on paper towels.
  6. Prepare the Harissa Yogurt Dip: In a small bowl, whisk together the yogurt, harissa paste, lemon juice, garlic, and salt until well combined.
  7. Serve the fritters immediately with the harissa yogurt dip.

Nutritional Estimate (per serving, based on 4 servings):

  • Calories: ~300-350 kcal
  • Protein: ~10-12g
  • Carbohydrates: ~25-30g
  • Fat: ~18-22g
  • Fiber: ~5-7g

Sunday, May 4, 2025

Kentucky Hot Brown Crêpe


A Bluegrass classic reimagined! Delicate crêpes embrace roasted turkey, crisp bacon, charred tomato, and a rich Gruyere Mornay. Pure comfort, elevated.

Wednesday, April 30, 2025

Indian Spiced "Taco" Salad Bowls


Crispy, edible bowls made from spiced lentil and rice flour, filled with a refreshing and flavorful Indian-inspired salad. A unique and healthy way to enjoy Indian flavors!

Monday, April 28, 2025

Chicken Tikka Wraps w/ Cucumber Curry Aioli


    Craving the vibrant spices and smoky char of tandoori chicken tikka, but without the tandoor oven? Look no further! These Chicken Tikka Wraps deliver all that authentic flavor in a convenient, handheld package. Tender, perfectly spiced chicken meets fresh, crisp vegetables, a cooling cucumber cream, and a zesty curry aioli, all nestled in warm, pillowy naan bread. Get ready for a flavor explosion that will transport your taste buds straight to the bustling streets of India!

The Quest for Tandoori at Home: Flavor Without the Fire

    There's something undeniably magical about chicken cooked in a tandoor. The intense heat and smoky environment create a unique texture and depth of flavor that's hard to replicate. But fear not, home cooks! With a few clever techniques, we can capture the essence of tandoori chicken right in our own kitchens.

The secret lies in a multi-pronged approach:

  • The Power of Marinade: A long and flavorful marinade is paramount. Yogurt tenderizes the chicken while a potent blend of aromatic spices – garam masala, cumin, coriander, turmeric, and red chili – infuses it with that signature tikka warmth. Don't skimp on the marinating time; the longer it sits, the deeper the flavor will penetrate. Overnight is ideal!
  • Embrace the Heat: While we might not have a clay oven reaching scorching temperatures, we can mimic that intensity with our trusty grill, broiler, or a screaming hot skillet. These methods will help create those desirable charred edges that are characteristic of tandoori cooking.
  • A Hint of Smoke: To nudge our chicken even closer to that authentic tandoori profile, a touch of smoked paprika in the marinade can work wonders, adding a subtle whisper of smokiness. Using a grill pan can also enhance this effect.

Building the Perfect Wrap: Layer Upon Layer of Deliciousness

These Chicken Tikka Wraps are more than just spiced chicken in bread. They're a carefully constructed symphony of textures and tastes:

  • The Star: Spiced Chicken Tikka: The heart of the wrap, each bite of the marinated and cooked chicken is an explosion of warm, savory spices with a hint of smoky char.
  • Cooling Counterparts: To balance the richness of the chicken, we introduce fresh, crisp shredded lettuce and juicy diced tomatoes. Their coolness and slight sweetness provide a refreshing contrast.
  • The Zesty Bite of Onion: Thinly sliced white onion adds a sharp, pungent bite that cuts through the creaminess and adds another layer of complexity.
  • The Soothing Embrace of Cucumber Cream: A simple yet brilliant addition, the cucumber cream offers a cooling and refreshing element that soothes the palate and complements the spices beautifully. The fresh cilantro and lemon juice brighten it up.
  • The Tangy Kick of Curry Aioli: A creamy, zesty aioli infused with the warm notes of curry powder adds another layer of flavor and moisture, tying all the elements together.
  • The Perfect Vessel: Warm Naan Bread: Soft, slightly chewy naan bread is the ideal wrap, providing a comforting and slightly doughy base to hold all these delicious ingredients.

Recipe: Chicken Tikka Wraps (Tandoor Optional!)

Yields: 4 servings Prep time: 30 minutes (plus marinating time) Cook time: 20 minutes

Ingredients:

  • For the Chicken Tikka:
    • 1.5 pounds boneless, skinless chicken thighs, cut into 1-inch pieces
    • 1 cup plain yogurt
    • 2 tablespoons lemon juice
    • 2 cloves garlic, minced
    • 1-inch piece ginger, grated
    • 1 teaspoon garam masala
    • 1 teaspoon ground cumin
    • 1 teaspoon ground coriander
    • 1/2 teaspoon turmeric powder
    • 1/2 teaspoon red chili powder (adjust 1 to your spice preference)  
    • 1/2 teaspoon smoked paprika (optional)
    • Salt to taste
  • For the Cucumber Cream:
    • 1 cup cucumber, peeled, seeded, and chopped
    • 1/2 cup plain yogurt
    • 1/4 cup chopped cilantro
    • 1 tablespoon lemon juice
    • Salt to taste
  • For the Curry Aioli:
    • 1/2 cup mayonnaise
    • 1 tablespoon curry powder
    • 1 tablespoon lemon juice
    • Salt to taste
  • For the Wraps:
    • 4 naan bread (or roti, pita, or even flour tortilla - wheat for extra flavor)
    • 1 cup shredded lettuce
    • 1 cup diced tomatoes
    • 1/2 cup thinly sliced white onion
    • Optional green chilies or for mild, green bell pepper

Equipment:

  • Large bowl
  • Grill, broiler, or large skillet
  • Small bowls

Instructions:

  1. Marinate the Chicken: In a large bowl, combine the yogurt, lemon juice, garlic, ginger, garam masala, cumin, coriander, turmeric, red chili powder, smoked paprika (if using), and salt. Add the chicken and mix well to coat. Cover and refrigerate for at least 4 hours, or preferably overnight.
  2. Prepare the Cucumber Cream: In a small bowl, combine the cucumber, yogurt, cilantro, lemon juice, and salt. Mix well and set aside.
  3. Prepare the Curry Aioli: In another small bowl, combine the mayonnaise, curry powder, lemon juice, and salt. Mix well and set aside.
  4. Cook the Chicken: Preheat your grill, broiler, or a large skillet to high heat. Cook the chicken until it is cooked through and slightly charred, about 8-10 minutes. If using a skillet, you may need to cook the chicken in batches to avoid overcrowding.
  5. Warm the wrap: Warm the wrap bread according to package directions. This usually involves a few seconds in a dry skillet, microwave, or oven.
  6. Assemble the Wraps: Lay out the warm bread. Spread a generous amount of cucumber cream and curry aioli on each naan. Top with shredded lettuce, diced tomatoes, sliced onion, and the cooked chicken tikka.
  7. Wrap and Serve: Fold in the sides of the naan and then roll it up tightly to create a wrap. Serve immediately and enjoy the explosion of flavors!!!

These Chicken Tikka Wraps are a fantastic way to enjoy the bold and aromatic flavors of Indian cuisine in a fun and convenient format. Whether you're packing a lunch, hosting a casual gathering, or simply craving a taste of something exciting, these wraps are sure to hit the spot. Enjoy the journey of flavors!

Saturday, April 26, 2025

Pretzel Philly Joes w/ "Whiz" Aioli


A playful and satisfying mashup of two American favorites, featuring savory ground beef with traditional cheesesteak flavors served on soft pretzel buns & topped with a creamy, "cheesy" aioli.

Wednesday, April 23, 2025

Pizza Sushi/Pinwheels


 A fun and creative appetizer that combines the flavors of classic pizzas with the presentation of sushi. These bite-sized rolls are sure to be a hit at any party!

Sunday, April 20, 2025

McDouble-Inspired Mac & Cheese


A bold, craveable fusion of creamy mac and cheese with all the classic flavors of a McDouble—beef, grilled onions, pickles, ketchup, and mustard. This isn't any harder than hamburger helper to make!


    There are some flavors that are so deeply tied to memory, they can instantly transport you. For me—and probably a lot of folks out there—that’s the unmistakable combo of a McDonald’s cheeseburger: juicy seasoned beef, melty cheese, tangy pickles, soft onions, and that sweet ketchup-meets-mustard finish. So what happens when you take that fast-food magic and fold it into the ultimate comfort food—mac and cheese?

You get McDouble Mac & Cheese—a dish that hits all the notes of nostalgia, indulgence, and pure joy.

This is not your average mac and cheese. It starts with a rich, creamy cheese sauce coating perfectly cooked elbow noodles. Then comes the seasoned ground beef, grilled onions, and here’s the twist that brings it all together: finely chopped dill pickles and a swirl of ketchup and mustard to finish each serving. It's everything you love about a cheeseburger, reimagined in forkfuls of comfort.

It’s not a gimmick—this dish is well-balanced and full of crave-worthy contrast. The beef is juicy and umami-rich. The onions are caramelized and sweet. The cheese sauce is decadent. And the pickles, ketchup, and mustard? That’s where the fun kicks in. You’re not just eating mac and cheese—you’re eating the soul of a McDouble, layered into a creamy, cheesy pasta dish that somehow makes perfect sense.

Why This Dish Works

There’s a reason this combination is iconic. McDonald’s, love it or leave it, nailed the flavor profile of satisfying, fast, and nostalgic food. But when you reimagine those flavors into something homemade and elevated, you get to control the quality, the balance, and the creativity.

This recipe is about more than just mixing beef and noodles. We take cues from what McDonald’s actually does:

  • Seasoned beef: Their patties are simple—salt and pepper, with a focus on the Maillard browning from a hot griddle. That’s the vibe we recreate here.

  • Grilled onions: Soft, lightly caramelized onions add subtle sweetness and depth.

  • Cheese sauce: Instead of cheese slices, we go full creamy mac and cheese with a sharp cheddar base.

  • Pickles and condiments: The chopped dill pickles and drizzles of ketchup and mustard mimic the exact finish you get in a McDouble—adding tang, acid, and brightness to each bite.

It’s the kind of comfort food that makes people laugh and say “no way,” right before going back for seconds. It’s familiar but surprising. Silly but genius.

And the best part? It’s just as easy to make as your weeknight mac and cheese.


Ingredients

For the Mac and Cheese:

  • 12 oz elbow macaroni (You are encouraged to cheat with boxed mac!)

  • 2 tablespoons butter

  • 2 tablespoons flour

  • 2 cups whole milk

  • 2 cups shredded sharp cheddar cheese

  • Salt and pepper, to taste

For the Beef Layer:

  • 1 lb ground beef (80/20 or 85/15)

  • 1/2 teaspoon kosher salt

  • 1/4 teaspoon black pepper

  • Optional: 1/4 teaspoon onion powder

For the Onions:

  • 1 small yellow onion, finely chopped

  • 1 teaspoon neutral oil or butter

  • Pinch of salt

For Assembly and Topping:

  • 1/2 cup sliced dill pickles, cut in half (preferably cold and crunchy)

  • Ketchup, for drizzling

  • Yellow mustard, for drizzling


Instructions

Step 1: Cook the Pasta

Bring a large pot of salted water to a boil. Add the elbow macaroni and cook until al dente, according to package directions. Drain and set aside.

Step 2: Make the Cheese Sauce

In a saucepan over medium heat, melt the butter. Whisk in the flour and cook for about 1 minute to form a roux. Slowly whisk in the milk, making sure no lumps remain. Cook until thickened and just bubbling. Remove from heat and stir in the shredded cheese until smooth. Season with salt and pepper to taste.

Step 3: Cook the Beef

While the cheese sauce cooks, heat a skillet over medium-high heat. Add the ground beef and season with salt and pepper (and onion powder, if using). Cook, breaking it up with a spatula, until browned and fully cooked through. Drain excess fat if necessary.

Step 4: Sauté the Onions

In a separate small skillet, heat oil or butter over medium heat. Add the chopped onions with a pinch of salt and sauté until soft and lightly golden, about 5–7 minutes. You want that classic griddled-onion aroma.

Step 5: Combine

In a large pot or bowl, mix the cooked macaroni with the cheese sauce until fully coated. Fold in the seasoned ground beef and sautéed onions. Stir to combine evenly.

Step 6: Add Pickles & Serve

Spoon portions into bowls. Sprinkle the chopped pickles generously over the top—don’t mix them in or cook them, or you’ll lose their crunch.

Finish by drizzling ketchup and mustard in thin lines or swirls across each serving. Be bold—it’s part of the experience.


Pro Tips & Notes

  • Pickles: Make sure your pickles are cold and crisp. Avoid bread & butter pickles—stick to classic dills.

  • Cheese Blend: Sharp cheddar brings the classic cheeseburger flavor, but feel free to mix in American or Monterey Jack for creaminess.

  • Make it baked: For a fun twist, layer it in a casserole dish, top with shredded cheese and pickles, and bake until bubbly.

  • Extra toppings: Toasted sesame seeds, crispy onions, or a dusting of burger seasoning can add even more depth.


Nutritional Estimate (per serving, based on 6 servings)

  • Calories: ~580–650 kcal

  • Protein: ~28g

  • Carbohydrates: ~40–50g

  • Fat: ~35g

  • Fiber: ~2g

Note: Exact nutrition will vary based on cheese and beef fat content, and how generous you go with ketchup/mustard.


    This McDouble Mac & Cheese isn’t just a quirky remix—it’s a full-on homage to one of America’s most iconic burgers, translated into the coziest food we know. It’s fast food nostalgia wrapped in a creamy, satisfying bowl that feels homemade but totally unexpected. Whether you’re feeding kids, friends, or just leaning into your own burger cravings, this dish is guaranteed to be a hit.

It’s playful. It’s comforting. It’s unforgettable. And once you’ve tried it, you’ll never look at mac and cheese the same way again.

Monthly Recipes & Posts: