

Showing posts with label Pasta & Noodles. Show all posts
Showing posts with label Pasta & Noodles. Show all posts
Sunday, April 12, 2026
Botanical Parmesan & Pecorino Lace Crisps
Thursday, April 9, 2026
Turning Leftover Coffee into Culinary Gold

We’ve all been there. It’s a Tuesday evening, the fridge is looking remarkably sparse, and the motivation to make a grocery run is sitting somewhere near absolute zero. You have a box of dry pasta, a couple of onions, a knob of butter, and the lukewarm remnants of this morning’s coffee sitting in the carafe. To the untrained eye, this is a culinary dead end. To us, it’s a canvas.
I have a thing for keeping costs low. More on that later... So stay tuned in & subscribe!
Today, we are stripping cooking down to its fundamental chemistry to create a dish that tastes like a long-simmered, Michelin-starred reduction, using ingredients that cost pennies. We are making a Caramelized Onion and Coffee Emulsion Pasta.
Yes, coffee. Before you question the sanity of this pairing, let’s look at the science of flavor profiling and why this unexpected marriage works so harmoniously.
The Science of the Skillet
This dish relies on three distinct pillars of culinary science: the Maillard reaction, acid-base flavor balancing, and starch-lipid emulsification.
1. The Maillard Reaction & Caramelization Our foundation is the humble yellow onion. When we cook onions low and slow, we initiate a complex breakdown of their cellular structure. The starches convert into simple sugars, and through the Maillard reaction (the browning of amino acids and reducing sugars), they develop a profound, almost jammy sweetness. However, a pan of caramelized onions on its own is cloying. It needs a counterbalance. In traditional French onion soup, this is achieved with dry wine and robust beef broth.
2. The Bitter-Acid Counterbalance Enter the black coffee. Brewed coffee is a complex matrix of over 1,000 chemical compounds. Crucially, it contains chlorogenic acids and tannins, providing both acidity and bitterness. When we use coffee to deglaze the pan of deeply sweet onions, the bitterness of the coffee perfectly neutralizes the excessive sweetness of the alliums. The coffee mimics the dark, roasted, earthy notes usually provided by roasted animal bones, creating a phantom "meatiness" that tricks the palate.
3. The Emulsion Matrix To turn this coffee-onion mixture into a sauce that clings lovingly to every strand of pasta, we rely on physics. By aggressively tossing undercooked pasta in the pan with a splash of highly starchy pasta water and a knob of butter (or a glug of olive oil), we force two unmixable liquids (fat and water) to combine. The starches act as a bridge, suspending the fat droplets in the liquid to create a glossy, creamy sauce without a single drop of heavy cream.
Thursday, February 19, 2026
Saffron-Gilded Capellini / Mei Fun

By utilizing a Salted Egg Yolk and Saffron emulsion, we pay homage to the "Golden" color of Singaporean Mei Fun while introducing a creamy, umami depth that is a modern Singaporean obsession. This is culturally resonant, scientifically distinct, and—most importantly—delicious.
A Singaporean Emulsion
There is a specific, nostalgic alchemy found in a cardboard carton of Singapore Mei Fun. It’s the scent of "wok hei" (the breath of the wok), the bite of white pepper, and that distinct yellow hue. But in our lab, we often ask: How do we evolve the texture without losing the soul?
Traditional rice vermicelli is delightful but fragile; it breaks under the weight of heavy proteins and absorbs liquid until it reaches a point of structural collapse. Enter Angel Hair Pasta (Capellini). Because it is a wheat-based noodle, it possesses a tensile strength and a porous surface that, when treated with a specific "dry-emulsion" technique, creates a mouthfeel that is both silky and resilient.
Today, we are moving away from the generic "curry powder" of Western take-out and moving toward a sophisticated Crustacean-Saffron Reduction. We’re using the science of emulsification to coat the wheat strands in a savory gold that won't rub off on your fingers, but will linger on your palate.
The Science of the "Al-Dente-Wok" Transition
The primary challenge in using Italian pasta for Asian stir-fry is starch management. If you boil angel hair to completion and then toss it in a wok, it becomes a gummy mess.
We utilize a 70% Hydration Rule. We par-boil the capellini for only three minutes—just enough to hydrate the outer layers—and finish the cooking process inside the wok using a concentrated "Flavor Emulsion." This allows the wheat protein to bind with the fats (from the pork and shrimp) and the liquids (from our saffron stock), resulting in a noodle that is infused from the inside out rather than just coated.
Why This Works
By using the salted egg yolk as a surfactant, we create a bridge between the water-based stock and the oil-based aromatics. This results in a "Dry Laksa" mouthfeel on an Italian noodle. Singaporean diners will recognize the flavor profile (Salted Egg/Saffron/White Pepper), while international audiences will appreciate the familiar "snap" of al dente pasta.
"Pantry Dragon" Easy Crispy Spicy Garlic Noodles

A revolutionary fusion of high-heat takeout textures and humble pantry staples that delivers a professional "wok hei" experience without needing a wok.

Innovation in the Back of the Cupboard
We’ve all been there: craving the salty, savory punch of high-end Chinese takeout but staring at a half-empty box of spaghetti and a lonely jar of peanut butter. Traditionalism is wonderful, but true culinary genius often happens when we are forced to improvise.
I wanted to create something that feels like it came from a bustling kitchen in Guangzhou but uses the "forgotten" items in a standard pantry. The secret here is a technique I call "The Double-Crunch Emulsion." By par-boiling standard pasta and then searing it in a mixture of honey and soy sauce, we achieve a texture that mimics authentic Hong Kong-style pan-fried noodles.
When I first tested this, the kitchen filled with that distinctive toasted garlic aroma. The first bite is a revelation—the noodles are chewy in the center but shatteringly crisp on the edges, coated in a sauce that balances the deep umami of soy with the surprising, velvety richness of emulsified peanut butter and vinegar. It’s familiar, yet completely new.
The Recipe
Prep time: 5 minutes | Cook time: 15 minutes | Serves: 2
Ingredients
The Base: 8 oz Spaghetti or Linguine (the humble pantry hero).
The Aromatics: 4 cloves Garlic (minced), 1 tsp Red Pepper Flakes (adjust for heat).
The "Secret" Sauce:
3 tbsp Soy Sauce
1 tbsp Peanut Butter (smooth is best for the emulsion)
1 tbsp Honey or Brown Sugar
1 tbsp Vinegar (Apple Cider or White)
1 tsp Toasted Sesame Oil (optional, if you have it)
The Crunch: 2 tbsp Neutral Oil (Vegetable or Canola).
Process & Steps
The Pasta Hack: Boil your spaghetti in salted water for 2 minutes less than the package instructions. We want a very firm "al dente" so they don't turn to mush during the frying phase. Drain and pat dry.
The Emulsion: In a small bowl, whisk together the soy sauce, peanut butter, honey, and vinegar. If the peanut butter is stiff, microwave it for 10 seconds first. Whisk until it looks like a smooth, glossy lacquer.
The Sear: Heat the neutral oil in your largest skillet over medium-high heat. Once shimmering, add the cooked noodles. Spread them out into a flat "pancake." Let them sizzle undisturbed for 3-4 minutes until the bottom layer turns golden and crisp.
The Fragrance: Toss the noodles to flip them, then create a small well in the center. Add your minced garlic and red pepper flakes. Cook for 30 seconds until the garlic is fragrant but not burnt.
The Glaze: Pour the sauce mixture over the noodles. Using tongs, toss vigorously. The sugars in the honey will caramelize, and the peanut butter will create a velvety coating that sticks to every strand.
Finish: Turn the heat to high for the final 60 seconds, tossing constantly to get that smoky "char" flavor.
Nutritional Estimate (Per Serving)
Calories: 540 kcal
Protein: 14g
Carbohydrates: 72g
Fats: 22g
Sodium: 1,200mg (varies by soy sauce brand)
This dish proves that you don't need a plane ticket or a specialized grocery store to experience the soul of Chinese-inspired cooking. It’s bold, it’s crunchy, and it’s likely already sitting in your kitchen waiting to be made.
Friday, February 13, 2026
Smoked Paprika and Saffron Risotto Curry

A stunning and audacious fusion of Italian comfort and global spice, this creamy risotto curry is a true showstopper. The smoky depth of paprika, the luxurious aroma of saffron, and the rich body of coconut milk come together in a dish that is at once familiar, comforting, and entirely new.
This dish was born from a moment of pure creative craving. On a cool evening, I found myself wanting the soul-soothing creaminess of a perfectly executed risotto, but also the vibrant, transportive flavors of a well-spiced curry. The question that sparked this entire creation was simple: why choose? Why couldn't the two be one?
Marrying the meticulous technique of Italian risotto with the flavor architecture of a curry is a delicate dance. Traditional risotto relies on Parmesan and butter for its signature finish. Here, we swap those for full-fat coconut milk, which provides a luscious, dairy-free creaminess that pairs beautifully with our chosen spices. The key, as any culinary expert will affirm, is the constant stirring and slow addition of hot broth—the patient process that coaxes the starches from the Arborio rice to create that signature velvety texture.
The flavor combination is where the magic really happens. Saffron, the star of the classic Risotto alla Milanese, lends its unmistakable floral aroma and golden hue. We then introduce a bold counterpoint: smoked paprika. It brings a deep, smoky character and a gorgeous sunset color that makes the dish visually stunning. A final touch of turmeric and a whisper of cayenne build the "curry" profile, creating a warming, complex sauce that the rice drinks up greedily. This isn't just a recipe; it's a testament to the idea that culinary boundaries are meant to be pushed.
Recipe
Yields: 3-4 servings Prep time: 10 minutes Cook time: 30 minutes
Ingredients:
6 cups low-sodium vegetable broth
Large pinch of saffron threads (about ¼ teaspoon)
2 tablespoons olive oil
1 large shallot, finely minced
2 cloves garlic, minced
1 ½ cups Arborio rice
½ cup dry white wine (like Pinot Grigio or Sauvignon Blanc)
1 teaspoon smoked paprika (sweet, not hot)
½ teaspoon turmeric powder
Pinch of cayenne pepper (optional)
1 can (13.5 oz) full-fat coconut milk
1 cup frozen peas, thawed
Salt and freshly ground black pepper to taste
For Garnish:
Coconut cream
Fresh cilantro, chopped
A dash of smoked paprika
Process/Steps:
Infuse the Broth: In a medium saucepan, bring the vegetable broth to a simmer. Turn off the heat and add the saffron threads. Let them steep to infuse the broth with their color and flavor. Keep the broth warm over very low heat.
Sauté Aromatics: In a large, heavy-bottomed pot or Dutch oven, heat the olive oil over medium heat. Add the minced shallot and cook for 3-4 minutes until softened and translucent. Add the garlic and cook for another minute until fragrant.
Toast the Rice: Add the Arborio rice to the pot. Stir constantly for about 2 minutes to toast the grains and coat them in the oil. The edges of the rice grains should look translucent.
Deglaze: Pour in the white wine. Stir continuously, scraping the bottom of the pot, until the wine is completely absorbed by the rice.
The Risotto Process: Begin adding the warm saffron broth to the rice, one ladleful (about ½ cup) at a time. Stir frequently, allowing each addition of broth to be almost completely absorbed before adding the next. This slow, patient process is key to a creamy risotto and should take about 18-20 minutes.
Add Spices and Coconut Milk: After most of the broth has been absorbed and the rice is al dente (cooked through but still with a slight bite), stir in the smoked paprika, turmeric, and cayenne pepper. Pour in the full-fat coconut milk and stir vigorously to combine. The risotto should be very creamy.
Add Peas and Season: Stir in the thawed peas and cook for another 2 minutes until they are heated through. Remove from heat. Season generously with salt and pepper to taste.
Serve: Ladle the risotto curry into warm bowls immediately. Garnish with a swirl of coconut cream, a sprinkle of fresh cilantro, and an extra dash of smoked paprika.
Nutritional Estimate (per serving, based on 4 servings):
Calories: 620
Fat: 28g
Saturated Fat: 20g
Carbohydrates: 78g
Fiber: 7g
Sugar: 5g
Protein: 11g
Disclaimer: This is an estimate based on the ingredients listed and may vary.

This risotto curry is a bold fusion of worlds, creating a dish that is both elegant and deeply comforting. I hope you enjoy every creamy, flavorful spoonful.
Friday, December 12, 2025
'Arrabbiata Diavola': The Spicy Pasta Challenge

Are you a spice aficionado? Do you crave a heat that ignites your senses and leaves you breathlessly reaching for more? Then prepare to meet your match: 'Arrabbiata Diavola', the "angry devil" pasta. This isn't just a spicy sauce; it's a fiery inferno of flavor, built upon the classic Italian arrabbiata and supercharged with the smoky, untamed heat of Calabrian 'Nduja, all crowned with a crunchy, spicy 'Nduja breadcrumb topping. This is a pasta dish that dares you to take the heat... and rewards you with an intensely delicious experience.
Here in Lexington, we appreciate a bit of zest in our lives, and lately, my culinary explorations have led me down a particularly spicy path. I wanted to create a dish that wasn't just hot for the sake of being hot, but one where the heat was a crucial element of a complex and deeply satisfying flavor profile. That's where the inspiration for 'Arrabbiata Diavola' struck.
We start with the foundational fury of a classic arrabbiata: San Marzano tomatoes simmered with garlic and a generous flurry of fiery red pepper flakes. But we don't stop there. We introduce the secret weapon: 'Nduja, the spreadable, spicy pork sausage from Calabria. As it melts into the tomato sauce, it releases its rich, porky flavor and a unique, slow-burn heat that permeates every strand of pasta.
But the devilish details don't end with the sauce. To add a textural counterpoint and another layer of intense flavor, we create crispy 'Nduja breadcrumbs. Breadcrumbs are toasted in the rendered spicy fat of the 'Nduja, infusing them with its signature heat and savory depth. Sprinkled generously over the finished pasta, they provide a delightful crunch and an extra kick with every bite.
Now, for the challenge: this recipe is scalable to your spice tolerance. Are you a mild-mannered enthusiast? Use a small amount of 'Nduja and go easy on the extra chili flakes. A true spice demon? Load it up! The beauty of 'Arrabbiata Diavola' is that it allows you to walk the fiery edge, creating a dish that's perfectly tailored to your personal heat preference. Just be warned: this pasta has a serious attitude.
Recipe
Yields: 4 servings Prep time: 10 minutes Cook time: 25 minutes
Ingredients:
For the 'Arrabbiata Diavola' Sauce:
2 tablespoons olive oil
4 cloves garlic, thinly sliced
1 teaspoon (or more, to taste) red pepper flakes
1 (28-ounce) can San Marzano tomatoes, crushed by hand
2-4 ounces 'Nduja sausage, crumbled or roughly chopped (See Note)
½ teaspoon salt, or to taste
¼ teaspoon black pepper, or to taste
Fresh basil leaves, torn, for garnish
For the Crispy 'Nduja Breadcrumbs:
2 ounces 'Nduja sausage, crumbled
½ cup panko breadcrumbs
1 clove garlic, minced (optional)
For Serving:
1 pound dried penne pasta (or your favorite shape)
Grated Pecorino Romano cheese (optional)
Note on 'Nduja: For a moderately spicy dish with great flavor, start with 2 ounces. For a significant kick, use 4 ounces. Adjust to your personal spice preference.
Process/Steps:
Cook the Pasta: Bring a large pot of salted water to a boil. Add the penne pasta and cook according to package directions until al dente. Reserve about 1 cup of the pasta cooking water before draining.
Make the Crispy 'Nduja Breadcrumbs: While the pasta cooks, heat a small skillet over medium heat. Add the crumbled 'Nduja. Cook, stirring occasionally, until the 'Nduja has rendered most of its fat and starts to crisp, about 3-5 minutes. Add the panko breadcrumbs and minced garlic (if using) to the skillet. Stir constantly until the breadcrumbs are golden brown and have absorbed the spicy 'Nduja fat, about 2-3 minutes. Be careful not to burn them. Remove the breadcrumbs from the skillet with a slotted spoon and set aside on a plate. Leave the spicy 'Nduja fat in the skillet.
Start the Sauce: In a large skillet or Dutch oven, heat the 2 tablespoons of olive oil over medium heat. Add the thinly sliced garlic and red pepper flakes. Cook, stirring constantly, until the garlic is fragrant and lightly golden (about 1 minute). Be careful not to burn the garlic, as it will turn bitter.
Build the 'Diavola' Flavor: Add the crumbled or chopped 'Nduja to the skillet with the garlic and chili flakes. Cook, stirring, until the 'Nduja melts and incorporates into the oil, releasing its spicy, porky goodness (about 2-3 minutes).
Add the Tomatoes: Pour in the crushed San Marzano tomatoes. Stir well to combine with the 'Nduja mixture. Bring the sauce to a simmer, then reduce the heat to low, cover, and let it cook for 10-15 minutes, allowing the flavors to meld and deepen. Season with salt and black pepper to taste.
Combine Pasta and Sauce: Drain the cooked pasta and add it directly to the skillet with the simmering sauce. Toss well to coat, adding a little of the reserved pasta cooking water if the sauce seems too thick.
Serve and Conquer: Divide the 'Arrabbiata Diavola' among bowls. Garnish generously with the crispy 'Nduja breadcrumbs and fresh torn basil. Offer grated Pecorino Romano cheese on the side, if desired.
Nutritional Estimate (per serving, approximate):
Calories: 650-750 (depending on portion size and amount of 'Nduja)
Fat: 30-40g (significant portion from 'Nduja)
Saturated Fat: 10-15g
Carbohydrates: 70-80g
Fiber: 6-8g
Sugar: 8-10g (naturally occurring from tomatoes)
Protein: 25-30g
Sodium: 800-1200mg (depending on salt added and 'Nduja content)
Disclaimer: This is an estimate and can vary based on specific ingredients used and portion sizes.
Dare to take on the 'Arrabbiata Diavola'? This is more than just a pasta dish; it's a spicy adventure that will test your limits and reward you with an incredibly flavorful and satisfying meal. Cook with caution... and enjoy the burn!
Tuesday, July 22, 2025
French Onion Soup Dumplings

An extraordinary appetizer that encapsulates all the rich, comforting flavors of a classic bowl of French Onion Soup into a single, perfect bite. Each dumpling holds a savory, molten core of deeply caramelized onion and rich beef broth, which bursts forth upon biting. Pan-fried for a crispy bottom and topped with a glorious crown of broiled Gruyère cheese, this is the ultimate comfort food fusion.
This recipe is the culmination of a dream: to capture the soul of my favorite soup in a new and unexpected form. How could one possibly get the savory broth, the sweet jammy onions, and the iconic cheesy crouton into one little package? The answer lies in a brilliant technique borrowed from the masters of the soup dumpling, Xiao Long Bao. The secret is creating a "solid" broth.
We achieve this by making a hyper-concentrated, deeply flavorful stock from slow-caramelized onions, sherry, brandy, and rich beef broth, then setting it with gelatin. When chilled, this magical concoction becomes firm, allowing it to be diced and easily wrapped in a delicate dumpling skin. When the dumpling is steamed, the gelatin melts, reverting to the luscious, savory soup that awaits inside.
But we don't stop there. A French Onion Soup experience isn't complete without the crispy, cheesy top. So, after the dumplings are pan-fried and steamed to perfection, we crown them with a generous blanket of nutty Gruyère cheese and slide them under the broiler until bubbly, golden, and irresistible. The result is a multi-layered textural experience: the gooey, melted cheese gives way to the soft, steamed dumpling wrapper, which encases the molten soup, all supported by a satisfyingly crispy pan-fried bottom. It’s a labor of love, but the final result is a culinary masterpiece that is truly unforgettable.
Recipe
Yields: About 24 dumplings Prep time: 45 minutes (plus 4-6 hours chilling time) Cook time: 30 minutes
Ingredients:
For the Gelatinized Soup Filling:
2 tablespoons unsalted butter
2 large yellow onions, very thinly sliced
½ teaspoon salt
1 teaspoon sugar
¼ cup dry sherry
2 tablespoons brandy
2 cups high-quality, rich beef broth
1 tablespoon unflavored gelatin powder
2 sprigs fresh thyme
For the Dumplings & Topping:
1 package (approx. 24) round dumpling wrappers
1 tablespoon neutral oil (like canola or grapeseed)
1 cup shredded Gruyère cheese
Fresh thyme leaves for garnish
Process/Steps:
Caramelize the Onions (Patience is Key): In a large, heavy-bottomed skillet or Dutch oven, melt the butter over medium-low heat. Add the sliced onions, salt, and sugar. Cook slowly, stirring every 5-10 minutes, for 30-40 minutes. The onions should become deeply browned, very soft, and jam-like. Do not rush this step.
Deglaze and Create the Soup Base: Increase the heat to medium-high. Pour in the sherry and brandy to deglaze the pan, scraping up all the flavorful browned bits from the bottom. Let the alcohol cook off for about 2 minutes. Add the beef broth and thyme sprigs. Bring to a simmer.
Set the Soup: In a small bowl, sprinkle the gelatin powder over 2 tablespoons of cold water and let it bloom for 5 minutes. Whisk the bloomed gelatin into the hot soup base until it is completely dissolved. Remove the thyme sprigs.
Chill the Filling: Pour the soup mixture into a shallow dish (an 8x8 inch baking dish is perfect). Let it cool to room temperature, then cover and refrigerate for at least 4 hours, or overnight, until completely firm and gelatinous.
Assemble the Dumplings: Once the filling is firm, use a knife to cut it into small ½-inch cubes. Place a dumpling wrapper on your work surface. Place one cube of the gelatinous filling in the center. Moisten the edges of the wrapper with a finger dipped in water. Fold and pleat the wrapper to seal the filling inside, creating a classic dumpling shape. Repeat with the remaining wrappers and filling.Pan-Fry and Steam: Heat the neutral oil in a large, non-stick, oven-safe skillet over medium-
high heat. Place the dumplings in the skillet, flat-side down, without overcrowding. Fry for 2-3 minutes, until the bottoms are golden brown and crisp. Without draining the pan, carefully pour in ½ cup of water. It will sizzle and steam aggressively. Immediately cover the skillet with a tight-fitting lid, reduce the heat to medium, and let the dumplings steam for 5-6 minutes.Add the Cheese Cap: Preheat your oven's broiler to high. Once the dumplings are steamed, remove the lid and let any remaining water evaporate. Turn off the heat. Sprinkle the shredded Gruyère cheese evenly over the top of the dumplings in the skillet.
Broil and Serve: Carefully transfer the entire skillet to the oven. Broil for 2-3 minutes, watching very closely, until the cheese is melted, bubbly, and beginning to brown in spots. Carefully remove the hot skillet from the oven. Garnish with a few fresh thyme leaves and serve immediately.
Nutritional Estimate (per serving, based on 6 servings of 4 dumplings):
Calories: 250
Fat: 13g
Saturated Fat: 7g
Carbohydrates: 18g
Fiber: 1g
Sugar: 4g
Protein: 12g
Disclaimer: This is an estimate based on the ingredients listed and may vary.
This is more than an appetizer; it's an event. The moment your guests cut into one and discover the rich soup inside is pure culinary magic. Enjoy the process and the delicious reward!
Tuesday, July 1, 2025
Spinach & Ricotta Pasta w/ Lemon & Herb

A bright, yet savory pasta - perfect for any day of the week!
Monday, June 30, 2025
Vegan Emerald Spaghetti

We could not ignore how good this would be without the inclusion of animal product...
We made a version of this that... We knew had to immediately be adapted to vegan and vegetarian peoples. And below is that version. Instead of boring you with a long drawn out post that muses over the food to give some background... The intent here speaks for itself. Below is our rendition of a vegetarian/vegan version of our Emerald Spaghetti. We recommend not even worrying about incorporating vegan meat into it- but we're happy if you decide to do so! We cook together. This dish represents that.
If it feels good... Cook it.
Emerald Speghetti w/ Spicy Sausage

A revolutionary pasta dish featuring a vibrant, savory spinach sauce, spicy sausage, and sweet peppers, proving that the best traditions are the ones you create yourself.
Let’s talk about spaghetti. For most of us, the word conjures a very specific image: long noodles tangled in a rich, red tomato sauce, perhaps dotted with meatballs or mushrooms. It’s a classic for a reason—it’s a cornerstone of comfort food. But here at Edible Intelligence, we love to ask, “What if?” What if we took the comfort of a hearty pasta dish and painted it with a completely different color, a completely different flavor profile? That question led to this recipe, a dish that will redefine what you think is possible with a bowl of pasta.
Forget everything you know about traditional sauces for a moment. Instead, imagine a sauce the color of emeralds, with the savory, earthy depth of fresh spinach, blended into a velvety, luxurious coating for your favorite noodles. We’re taking inspiration from the texture of saag, that incredible Indian spinach dish, but thinning it out just enough to create a perfect, clinging sauce that weaves its way around every strand of pasta. It’s vibrant, it’s bold, and it’s utterly delicious.
This verdant sauce is the star, but the supporting cast is just as crucial. To cut through the earthy spinach, we need something with a punch of savory spice. Enter the sausage. We’re giving you options here: a classic, fennel-flecked Italian sausage brings a familiar, comforting warmth, while a spicy Andouille sausage adds a distinct, smoky Cajun kick. Or better yet, why not use both? Sautéed with sweet diced onions and a confetti of red and yellow bell peppers, this mixture creates a foundation of flavor that is both rustic and robust. The sweetness of the peppers and the sharp bite of the onion are the perfect counterpoint to the rich sausage.
We’re all about customization, so we’re throwing in some optional-but-highly-recommended finishing touches. A handful of salty, briny black olives or the tangy, bright heat of banana peppers can elevate this dish to another level, adding little bursts of flavor that make every bite an adventure.
The final dish is a masterpiece of contrasts. The smooth, green sauce against the hearty, colorful chunks of sausage and peppers. The earthy flavor of the spinach brightened by the spice of the sausage. It’s a dish that feels both incredibly innovative and deeply comforting. So grab your favorite long noodle—be it classic spaghetti, flat fettuccine, or delicate angel hair—and get ready to create a new pasta night tradition.
Friday, June 20, 2025
Smoked Cathedral City Steak & Spinach Pasta

Where has this been my whole life?
Here in Lexington, Kentucky, we cherish traditions, but we also have a taste for the unexpected, for flavors that dance on the palate and tell a new story. Lately, I've been pondering the rich, comforting textures of Indian Saag Paneer or Palak Gosht – those vibrant spinach dishes simmered with spices and often featuring cheese or meat. It got me thinking: why doesn't Italian cuisine have its own deeply comforting, spinach-centric dish in this vein?
That thought sparked an idea, a culinary fusion in spirit, if not strict origin. What if we took the creamy, dreamy texture of a spinach sauce, infused it with the smoky depth of a good aged cheddar (think of the robust character of Smoked Cathedral City), and paired it with the savory goodness of sautéed wild mushrooms, sweet caramelized onions, and crispy smoked bacon? And for the star protein, a perfectly seared steak, sliced and draped over this luxurious pasta creation?
The result, my friends, is the Smoked Cathedral City Steak & Spinach Pasta – a dish that feels both familiar and intriguingly novel. It’s the comfort of creamed spinach elevated to new heights, the earthy notes of the mushrooms singing alongside the smoky cheese, the salty bacon adding a delightful crunch, and the tender steak providing a satisfying richness. This isn’t yourNonnas classic, but it might just become a new family favorite.
The beauty of this dish lies in its layers of flavor. The smoked cheddar in the sauce isn't overpowering; instead, it provides a subtle but unmistakable depth that complements the fresh spinach beautifully. The wild mushrooms, sautéed until tender and slightly browned, lend an earthiness that grounds the dish, while the caramelized onions offer a touch of sweetness. And the bacon? Well, it’s bacon – adding that irresistible smoky, salty counterpoint.
Choosing the right pasta is key. We opted for wide ribbons of pappardelle, their generous surface area perfect for cradling the rich and flavorful sauce. Rigatoni would also work wonderfully, their ridges catching every last bit of creamy goodness.
The steak is the crowning glory. A good sirloin or flat iron, seasoned simply and seared to your preferred doneness, adds a touch of elegance and heartiness. Sliced thinly, it mingles beautifully with the sauced pasta, each bite a harmonious blend of textures and tastes.
This Smoked Cathedral City Steak & Spinach Pasta is a dish that's perfect for a cozy evening in, a special occasion, or anytime you're craving something truly satisfying and a little bit different. It’s a testament to how inspiration can come from unexpected places, and how culinary traditions can spark entirely new and delicious creations.
Ready to try this novel Italian-inspired comfort dish? Let’s get cooking!
Smoked Cathedral City Steak & Spinach Pasta
A creamy, smoky spinach pasta featuring sautéed mushrooms, caramelized onions, crispy bacon, and tender steak.
Yields: 4 servings Prep time: 30 minutes Cook time: 45 minutes
Ingredients:
For the Steak:
- 1.5 lbs sirloin steak or flat iron steak, about 1-inch thick
- 1 tablespoon olive oil
- 1 teaspoon smoked paprika
- 1/2 teaspoon garlic powder
- Salt and freshly ground black pepper to taste
For the Pasta:
- 1 pound pappardelle pasta (or wide rigatoni)
- 2 tablespoons olive oil
- 4 ounces smoked bacon, cut into lardons (small cubes or strips)
- 1 large yellow onion, thinly sliced
- 8 ounces wild mushrooms (shiitake, oyster, cremini, or a mix), sliced
- 4 cloves garlic, minced
- 10 ounces fresh spinach, roughly chopped
- 1.5 cups heavy cream
- 8 ounces Smoked Cathedral City cheddar cheese (or a good quality smoked cheddar), grated
- 1/4 teaspoon freshly grated nutmeg
- Salt and freshly ground black pepper to taste
- 1/4 cup toasted pine nuts, for garnish
- Aged balsamic glaze, for drizzling (optional)
- Fresh thyme sprigs, for garnish (optional)
Instructions:
1. Prepare the Steak: * Pat the steak dry with paper towels. In a small bowl, mix the olive oil, smoked paprika, garlic powder, salt, and pepper. Rub this mixture all over the steak. * Let the steak sit at room temperature for at least 20 minutes before cooking.
2. Cook the Bacon and Sauté Vegetables: * Bring a large pot of salted water to a boil for the pasta. * In a large, heavy-bottomed skillet or Dutch oven, cook the bacon lardons over medium heat until crispy. Remove the bacon with a slotted spoon and set aside, leaving the rendered fat in the pan. * Add the sliced onions to the bacon fat and cook over medium-low heat, stirring occasionally, until deeply golden and caramelized (about 15-20 minutes). * Add the sliced mushrooms to the pan and sauté over medium heat, stirring occasionally, until they release their liquid and turn golden brown (about 8-10 minutes). * Stir in the minced garlic and cook for another minute until fragrant.
3. Make the Smoked Spinach Sauce: * Add the chopped spinach to the skillet with the mushrooms and onions. Stir until the spinach wilts down significantly. * Pour in the heavy cream and bring to a gentle simmer. Cook for 5-7 minutes, allowing the sauce to slightly thicken. * Remove the skillet from the heat and stir in the grated smoked cheddar cheese and freshly grated nutmeg until the cheese is melted and the sauce is smooth. Season with salt and pepper to taste.
4. Cook the Pasta: * Add the pappardelle pasta to the boiling water and cook according to package directions until al dente. Reserve about 1 cup of the pasta cooking water before draining. * Drain the pasta and add it directly to the skillet with the smoked spinach sauce. Toss well to coat. If the sauce seems too thick, add a little of the reserved pasta water to reach your desired consistency.
5. Cook the Steak: * While the pasta is cooking, heat a separate cast-iron skillet or heavy-bottomed pan over high heat until it’s very hot. Add a tablespoon of olive oil (if needed, depending on the fat content of your steak). * Sear the steak for 3-5 minutes per side (depending on thickness and desired doneness) until a nice crust forms and the internal temperature reaches your preference (e.g., 130-135°F for medium-rare). * Remove the steak from the pan and let it rest on a cutting board for at least 10 minutes before slicing thinly against the grain.
6. Assemble and Serve: * Divide the smoked spinach pasta among bowls. * Arrange slices of the seared steak over the pasta. * Garnish with the crispy bacon lardons, toasted pine nuts, and a drizzle of aged balsamic glaze (if using). Add a fresh sprig of thyme for visual appeal, if desired.
Nutritional Estimate (per serving, approximate):
- Calories: 700-850 (depending on steak size and cream amount)
- Protein: 50-60g
- Fat: 40-50g
- Carbohydrates: 50-60g
(Note: This is an estimate and will vary based on specific ingredients and portion sizes.)
A Novel Italian Comfort
The Smoked Cathedral City Steak & Spinach Pasta is more than just a meal; it's an experience. It’s the comforting embrace of creamed spinach reimagined with smoky sophistication, the savory dance of mushrooms and steak, and the satisfying chew of perfectly cooked pasta. It’s a novel dish born from a simple thought, a culinary exploration that we hope you’ll enjoy as much as we do. Buon Appetito!
Saturday, June 7, 2025
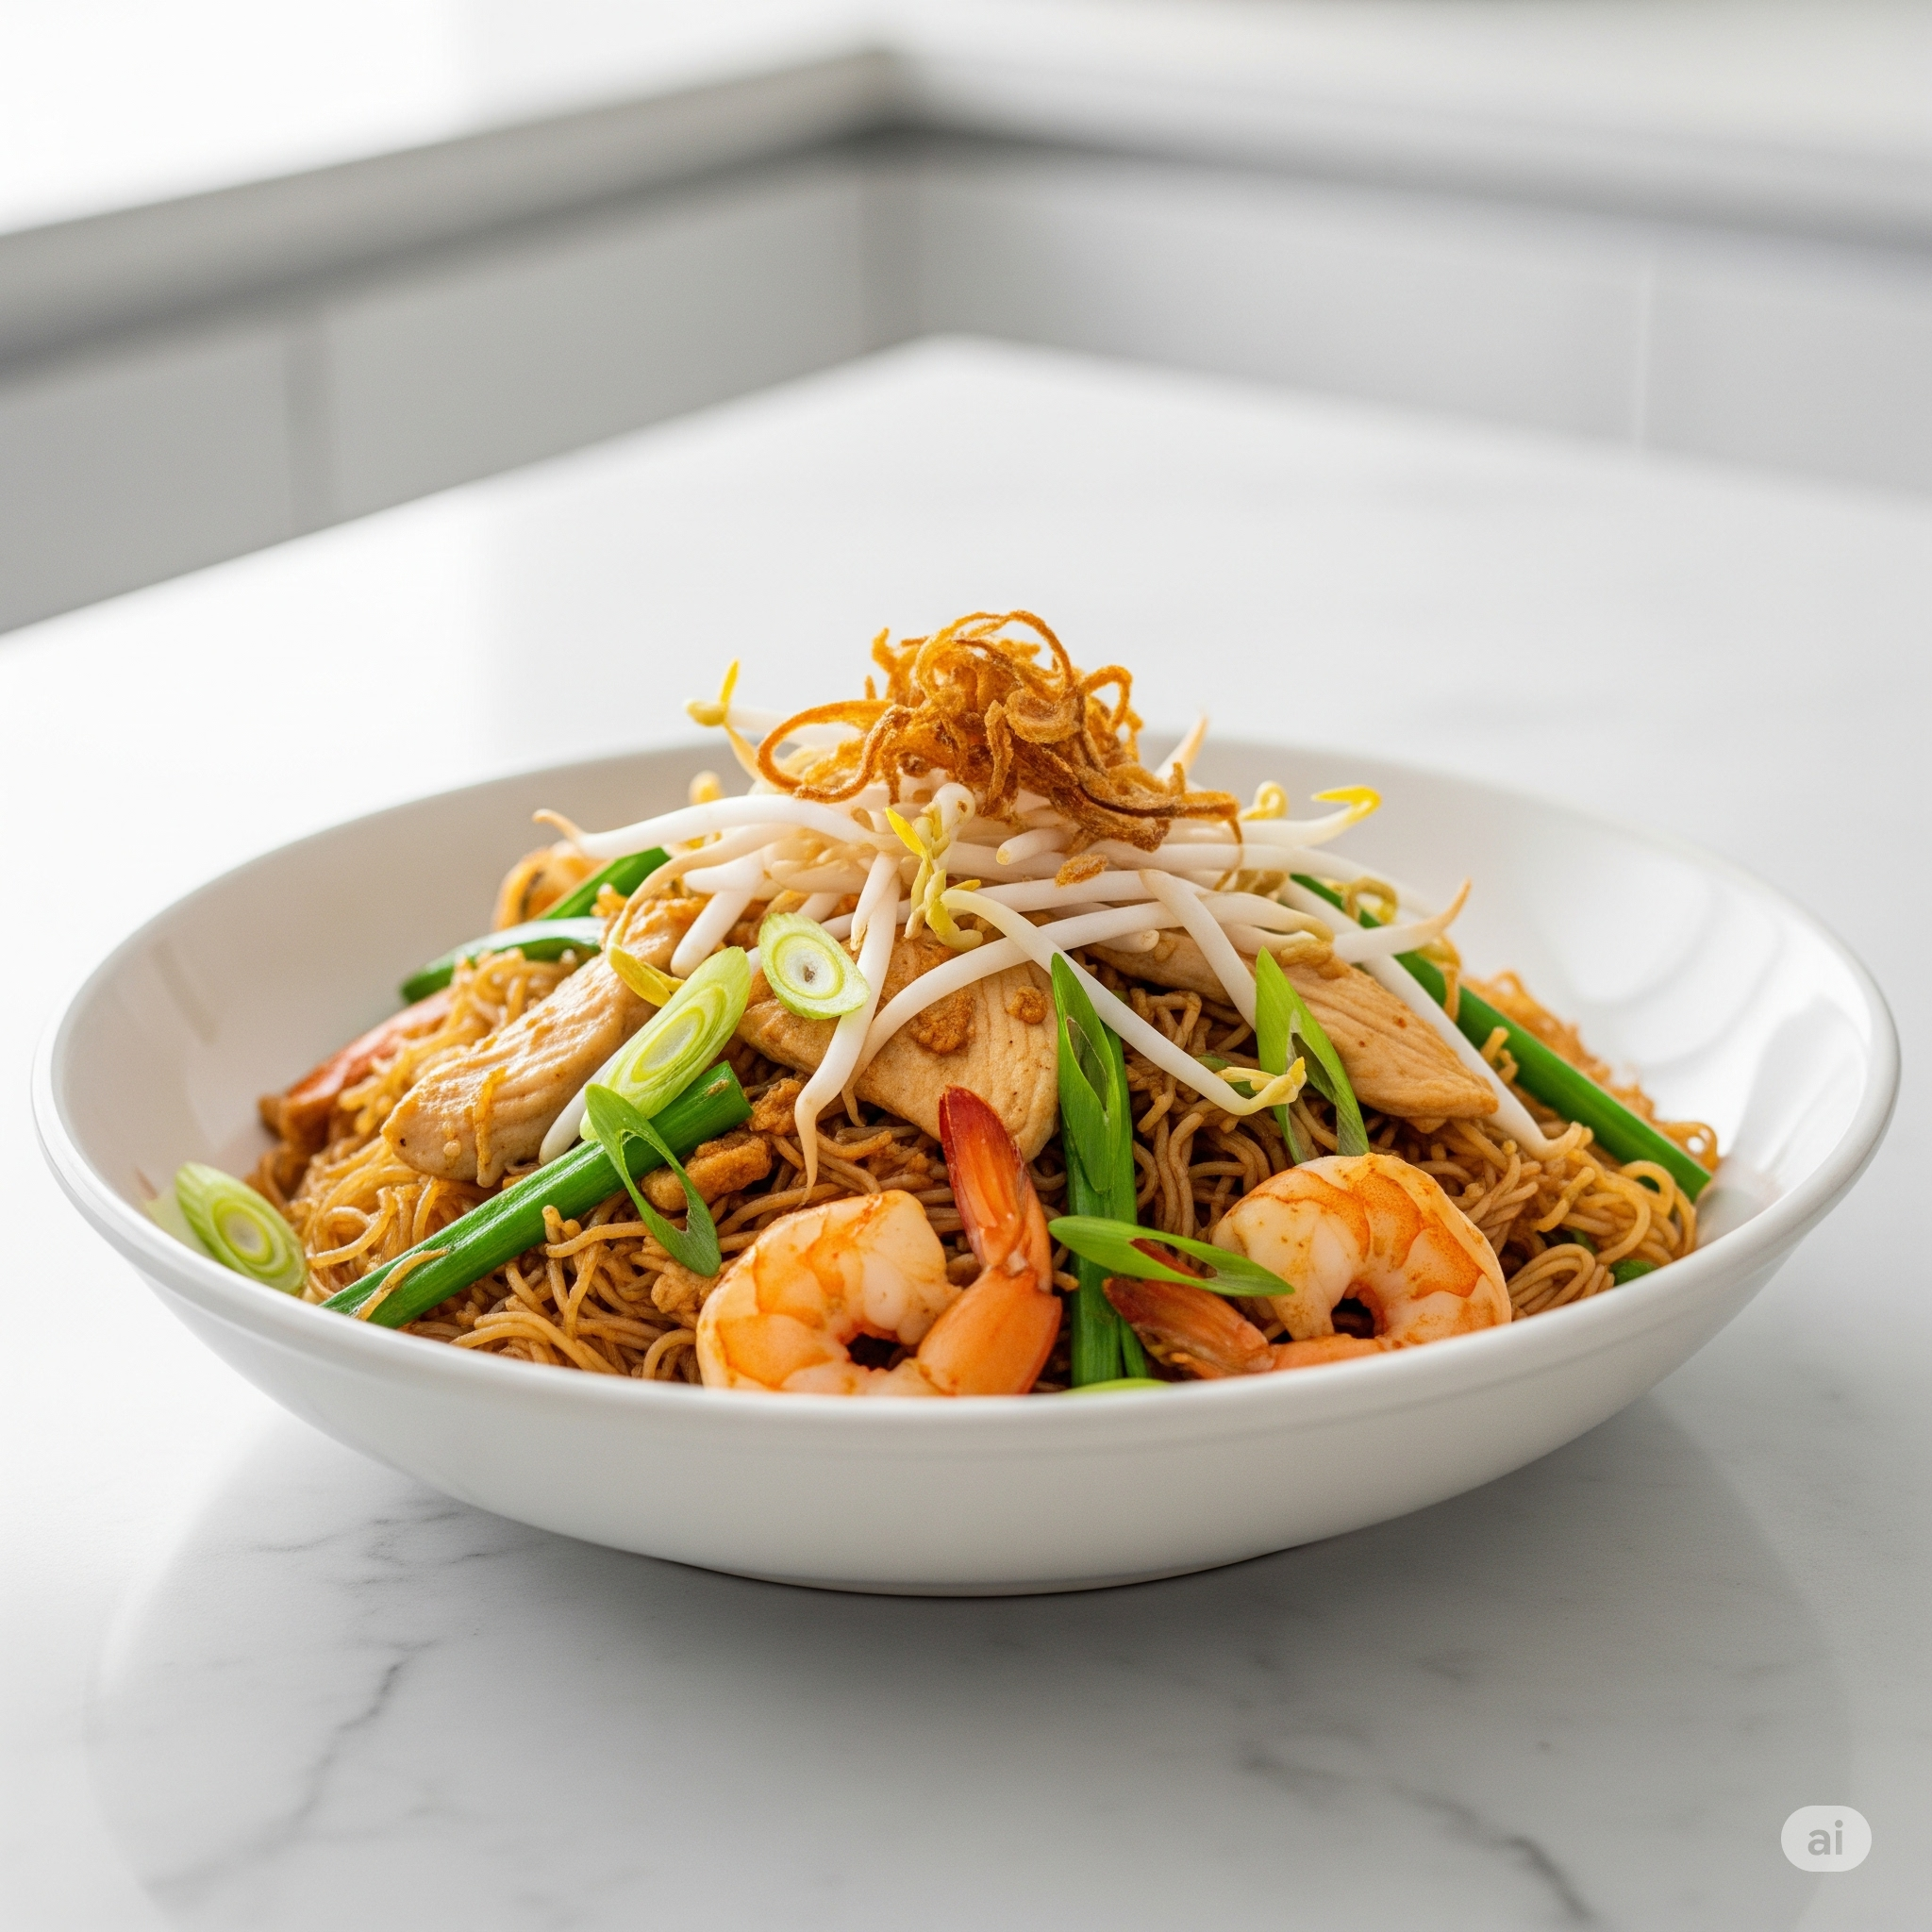
Singaporean Mei Fun Biryani

Imagine the bustling, vibrant energy of a Singaporean hawker stall meeting the regal, aromatic allure of a traditional Indian kitchen. This Singaporean Mei Fun Biryani is precisely that—a culinary masterpiece born from a love of two iconic dishes. It takes the familiar, wok-kissed comfort of curry-infused rice vermicelli and elevates it through the sophisticated, slow-steamed layering technique of biryani. The result is a dish that's both excitingly new and deeply comforting, with each forkful revealing fragrant noodles, tender marinated chicken, plump shrimp, and the satisfying crunch of fresh vegetables. It's a culinary adventure that respects its roots while creating something utterly unique.
A Tale of Two Kitchens
I've always been captivated by the seemingly effortless perfection of Singapore Mei Fun. It's a dish that has to be just right—the noodles perfectly cooked, the curry flavor present but not overpowering, and a delightful mix of textures from shrimp, pork, and crisp vegetables. On the other hand, a great biryani is an event. It's a celebration of spices, with layers of fragrant basmati rice and succulent meat, all slow-cooked to perfection in a sealed pot, a technique known as dum. The idea of combining them felt both audacious and irresistible.
The challenge was clear: how to infuse the delicate, quick-cooking nature of rice vermicelli with the deep, melded flavors of a dum-cooked biryani without turning the noodles to mush? The secret lay in reimagining the process. Instead of cooking the noodles and rice separately, I decided to treat the mei fun noodles as if they were the rice. By creating a rich, flavorful biryani-style masala gravy and layering it with soaked (but uncooked) noodles, fresh herbs, and crispy fried onions, we could use a very short, gentle steaming process. This allows the noodles to absorb all the aromatic steam from the masala below, cooking them perfectly while soaking up the complex flavors of cardamom, cinnamon, cloves, and saffron, all bridged by that signature touch of Madras curry powder.
The experience of making it is a sensory journey. The kitchen fills with the heady aroma of whole spices toasting, followed by the savory sizzle of the masala. The final moment of opening the pot is a true reveal—a cloud of fragrant steam gives way to beautifully cooked, saffron-tinged noodles, jeweled with chicken, shrimp, and herbs. It’s a dish that will impress a seasoned cook with its technique but is surprisingly straightforward for a beginner to master.
The Recipe
Ingredients
For the Noodles & Saffron:
- 200g thin rice vermicelli noodles
- 2 tbsp warm milk
- A generous pinch of saffron threads
For the Marinade (Chicken & Shrimp):
- 250g boneless, skinless chicken thighs, cut into bite-sized pieces
- 150g raw shrimp, peeled and deveined
- 2 tbsp plain yogurt
- 1 tbsp soy sauce
- 1 tsp ginger-garlic paste
- 1 tsp Madras curry powder
- ½ tsp turmeric powder
- ½ tsp red chili powder (or to taste)
- ¼ tsp Chinese five-spice powder
- Salt to taste
For the Biryani Masala:
- 2 tbsp ghee or neutral oil
- 1 large onion, thinly sliced (for frying)
- Whole Spices: 2 green cardamom pods, 2 cloves, 1-inch cinnamon stick, 1 bay leaf
- 1 medium onion, finely chopped
- 1 tbsp ginger-garlic paste
- 1 medium tomato, pureed
- 1 red bell pepper, thinly sliced
- 1 carrot, julienned
- 1 tsp Madras curry powder
- ½ tsp ground coriander
- ¼ tsp ground cumin
- A handful of fresh mint leaves, chopped
- A handful of fresh cilantro, chopped
For Layering & Garnish:
- 1 cup fresh bean sprouts
- 2 scallions, thinly sliced
- Extra chopped mint and cilantro
- Fried onions (prepared from the sliced onion above)
Process
-
Prepare the Key Components:
- In a small bowl, add the saffron threads to the warm milk and set aside to bloom.
- Place the rice vermicelli in a large bowl and cover completely with warm tap water. Let it soak for 15-20 minutes, or until pliable but still firm. Drain thoroughly and set aside. Do not over-soak.
- In a separate bowl, combine the chicken, shrimp, and all marinade ingredients. Mix well and let it rest for at least 20 minutes.
-
Fry the Onions (Birista):
- In a heavy-bottomed pot or Dutch oven (the one you'll use for the biryani), heat the ghee or oil over medium heat.
- Add the thinly sliced onion and fry, stirring occasionally, until it becomes deep golden brown and crispy. This can take 10-15 minutes. Be patient, as this adds a crucial flavor.
- Using a slotted spoon, remove the fried onions and set them aside on a paper towel. Leave about 2 tablespoons of the flavored ghee/oil in the pot.
-
Create the Masala:
- To the same pot, add the whole spices (cardamom, cloves, cinnamon, bay leaf) and toast for 30 seconds until fragrant.
- Add the finely chopped onion and sauté until soft and translucent.
- Stir in the 1 tbsp of ginger-garlic paste and cook for another minute.
- Add the marinated chicken and shrimp to the pot. Cook for 5-7 minutes, until the chicken is lightly browned and the shrimp just turns pink.
- Stir in the tomato puree, sliced bell pepper, and julienned carrot. Add the ground spices (curry powder, coriander, cumin) and salt.
- Cook for 5-7 minutes, until the oil begins to separate from the masala. Stir in the chopped mint and cilantro. You should have a thick, fragrant gravy.
-
Layer and "Dum" (Steam):
- Remove the pot from the heat. Spread the masala evenly at the bottom.
- Create the first layer by scattering half of the soaked and drained rice vermicelli over the masala.
- Sprinkle over half of the fried onions, half of the remaining fresh mint and cilantro, and half of the saffron milk.
- Top with the remaining rice vermicelli, creating the final layer.
- Pour the rest of the saffron milk over the top. Garnish with the remaining fried onions and fresh herbs.
- Cover the pot with a tight-fitting lid. To create a better seal, you can place a clean kitchen towel between the pot and the lid.
- Cook on the lowest possible heat setting for 8-10 minutes. This is just to steam the noodles through.
-
Serve:
- Turn off the heat and let the pot rest, still covered, for 5 minutes.
- Open the lid and gently fluff the noodles with a fork, mixing the layers slightly as you serve.
- Top with a generous amount of fresh bean sprouts and sliced scallions for that signature Mei Fun crunch.
Nutritional Estimate
(This is an approximation and can vary based on specific ingredients used.)
- Serving Size: 1 serving (Recipe makes approx. 2-3 servings)
- Calories: 550-650 kcal
- Protein: 30g
- Carbohydrates: 65g
- Fat: 20g
- Sodium: 900mg
This Singaporean Mei Fun Biryani is more than just a recipe; it's a conversation between two culinary worlds. We hope you enjoy the process of creating and sharing this unique and delicious dish. Happy cooking!
Uttapam on the Silk Road

A Hakka Noodle Revelation
Journey to a culinary crossroads where the comforting, slightly tangy South Indian uttapam meets the savory, umami-rich flavors of Indo-Chinese Hakka noodles. Our Hakka Noodle Uttapam is a dish that speaks to the heart – a harmonious blend of textures and tastes, made even more enticing with a drizzle of fiery Szechuan chili oil and the cooling caress of coconut raita.
From Chennai to China, A Love Story on the Griddle
As someone with a South Indian background, the uttapam holds a special place, its fermented rice and lentil batter providing a soft, slightly sour base for endless flavorful toppings. We're about to embark on a delightful twist, drawing inspiration from the dynamic flavors of Indo-Chinese cuisine, especially the universally loved Hakka noodles.
Our unique take isn't just about topping an uttapam with Hakka noodles. We're creating a true fusion, incorporating the essence of Hakka noodles into the uttapam itself. This means thoughtfully layering the savory, stir-fried noodle dish with its signature soy sauce, ginger, and garlic notes either into the batter for a thoroughly interwoven experience, or as a distinct, tantalizing layer cooked atop the uttapam. This results in a truly exciting textural and flavor interplay unlike any other. The aromatic Szechuan chili oil adds a customizable level of heat and tingling spice while the cooling coconut raita beautifully tempers the spice with its creamy, refreshing touch.
Imagine the sizzle on the griddle as the uttapam cooks, the enticing aroma of fermented batter mingling with ginger, garlic, and soy. The Hakka noodles, stir-fried to chewy perfection, add a delightful bounce to the soft, pillowy uttapam. As you take a bite, the soft tang of the uttapam base gives way to the savory depth of the noodles, followed by a customizable kick from the chili oil, and a soothing, cooling caress from the coconut raita. This isn't just a meal; it's an experience, a journey from South India to China, all on one delicious plate.
Uttapam on the Silk Road: Hakka Noodle Recipe
Yields: 4 servings Prep time: 30 minutes (excluding batter fermentation time) Cook time: 30 minutes
Ingredients:
For the Uttapam Batter:
- 1 cup rice (ideally parboiled rice)
- 1/2 cup urad dal (split black gram lentils)
- 1/4 teaspoon fenugreek seeds
- Water for soaking and grinding
- Salt to taste
For the Hakka Noodles:
- 8 oz dried Hakka noodles (or chow mein noodles, linguine)
- 2 tablespoons cooking oil
- 1 teaspoon finely chopped ginger
- 2 cloves garlic, minced
- 1/2 cup thinly sliced onion
- 1/2 cup thinly sliced bell peppers (mixed colors)
- 1/4 cup shredded cabbage
- 2 tablespoons light soy sauce
- 1 tablespoon rice vinegar
- 1/2 teaspoon sugar
- 1/4 teaspoon white pepper
For the Szechuan Chili Oil:
- High-quality store-bought Szechuan chili oil, or
- (Homemade - see notes below)
For the Coconut Raita:
- 1 cup plain yogurt (full-fat or Greek yogurt)
- 1/2 cup grated fresh or desiccated unsweetened coconut
- 2 tablespoons chopped cilantro
- 1 green chili, finely chopped (optional)
- 1/4 teaspoon roasted cumin powder
- Salt to taste
Optional additions/variations:
- Grated carrots, thinly sliced scallions (for the Hakka noodles)
- Sesame oil (for the Hakka noodles)
- Chopped peanuts or cashews (for garnish)
Process/Steps:
1. Prepare the Uttapam Batter (requires advance preparation):
- Rinse the rice, urad dal, and fenugreek seeds together in a bowl.
- Soak them in enough water to cover them completely for at least 4-6 hours, or preferably overnight.
- Drain the soaked ingredients.
- In a blender or grinder, grind the soaked ingredients with just enough water to form a smooth, thick batter. The batter should be thicker than pancake batter but pourable.
- Add salt to taste.
- Cover the batter and let it ferment in a warm place for 8-12 hours, or until it has doubled in volume and has a slightly
sour aroma.
2. Cook the Hakka Noodles:
- Cook the noodles according to package directions. Drain and rinse with cold water to prevent sticking. Set aside.
- Heat 2 tablespoons of oil in a wok or large skillet over medium-high heat.
- Add the ginger and garlic. Sauté for about 30 seconds until fragrant.
- Add the onion and bell peppers. Stir-fry for 2-3 minutes until slightly softened.
- Add the shredded cabbage. Stir-fry for another minute.
- Add the cooked noodles, soy sauce, rice vinegar, sugar, and white pepper. Toss well to combine. Cook for 1-2 minutes, stirring constantly. Taste and adjust seasoning. Keep warm.
3a. Option 1: Hakka Noodles Stirred into the Uttapam Batter:
- Gently fold about half of the prepared Hakka noodles into the fermented uttapam batter.
3b. Option 2: Hakka Noodles Layered on Top:
- Keep the prepared Hakka noodles separate.
4. Cook the Uttapam:
- Heat a lightly oiled griddle or non-stick pan over medium heat.
- Pour a ladleful of the uttapam batter (either plain, or with the noodles mixed in - depending on which option you choose) onto the hot griddle and spread it gently into a circle, about 4-5 inches in diameter.
- If you are using option 2, spread a generous portion of the cooked Hakka noodles over the top of the uttapam on the griddle.
- Cook for 2-3 minutes per side, or until golden brown and cooked through.
- If desired, drizzle a little more oil around the edges while cooking.
5. Prepare the Coconut Raita:
- In a bowl, combine the yogurt, grated coconut, chopped cilantro, green chili (if using), roasted cumin powder, and salt. Mix well.
6. Serve:
- Serve the hot uttapams drizzled generously with Szechuan chili oil and a side of cooling coconut raita.
- Garnish with chopped peanuts or cashews if desired.
Notes on Homemade Szechuan Chili Oil (Optional):
- You'll need about 1 cup of neutral oil (e.g., canola, vegetable).
- In a heatproof bowl, combine 2-3 tablespoons of Szechuan peppercorns and 4-6 dried red chilies (broken into pieces).
- Heat the oil in a saucepan until it shimmers.
- Carefully pour the hot oil over the spices. The spices will sizzle.
- Let it steep for at least 30 minutes, or longer for a more intense flavor.
- Strain the oil, discarding the solids. (You can also add other aromatics to the oil, such as garlic, ginger, star anise).
Nutritional Estimate (per serving, approximate):
- Calories: 500-600
- Protein: 15-20g
- Fat: 20-30g
- Carbohydrates: 60-70g
(Disclaimer: This is a rough estimate. Actual nutritional values may vary based on specific ingredients and quantities used.)
Monday, May 26, 2025
Crab Rangoon Fried Ravioli w/ Sweet & Sour Chili Sauce

Get ready for a mind-blowing texture swap that will make your taste buds sing! We've taken everything you love about creamy crab rangoon, elevated the filling with luxurious ricotta cheese, and packed it all inside crispy, golden-fried ravioli. Served with a zesty sweet chili dip (and wait 'til you hear our wild cocktail sauce idea!), these are an unforgettably fun and utterly delicious appetizer experience.
Sunday, May 25, 2025
Philly Whiz Cavatappi | Philly Mac n' Cheesesteak

Your Easiest Cheesesteak Fix!
Get all the ooey-gooey, beefy, cheesy goodness of a classic Philly cheesesteak tossed with fun cavatappi pasta – in under 30 minutes! This crazy delicious, mostly one-pan wonder is too easy and too good to resist.
Let's be honest, sometimes a craving for a Philly cheesesteak hits hard. That savory, thinly sliced steak, those perfectly sautéed peppers and onions, and that iconic, unapologetically cheddary Whiz... it's a masterpiece of comfort food. But who says you need to book a flight to Philadelphia or even leave your kitchen for more than half an hour to satisfy that urge?
Enter your new weeknight hero: Stovetop Philly Whiz Cavatappi!
I know what you might be thinking – pasta? With Cheez Whiz? Trust me on this one. We're taking all the soul-satisfying components of an authentic Philly cheesesteak (yes, especially the Whiz – because if you know, you know) and transforming them into an unbelievably easy and ridiculously tasty pasta dish. My family devoured this the first time I made it, and it’s shot to the top of our "emergency comfort food" list. It's the kind of meal that makes a dreary Tuesday feel like a celebration.
Why is this so genius and simple?
- Flavor Bomb: We're not skimping on any of that classic cheesesteak taste.
- Speedy Steak: Thinly sliced flank steak cooks in minutes.
- Veggies Made Easy: Quick sauté for those peppers and onions.
- Instant Icon Sauce: Cheez Whiz melts into a glorious, glossy sauce faster than you can say "wit or witout."
- Fun Pasta Factor: Twirly, joyful cavatappi pasta grabs onto every bit of that cheesy, beefy goodness. No meticulous layering, no baking, just pure, straightforward deliciousness.
Seriously, this dish comes together so quickly, you'll be wondering where it's been all your life. It’s hearty, it’s cheesy, it’s packed with flavor, and it’s on the table before anyone can get too hangry. Ready to ditch the takeout menu and make some magic?
Stovetop Philly Whiz Cavatappi
All the iconic flavor of a Philly cheesesteak in a quick and easy pasta dish, featuring real Cheez Whiz, tender flank steak, and sautéed peppers and onions.
Yields: 4 servings Prep time: 10-15 minutes Cook time: 20 minutes
Ingredients:
- 1 lb flank steak, very thinly sliced against the grain
- 1 tablespoon olive oil (or vegetable oil)
- 1 medium yellow onion, thinly sliced
- 1 green bell pepper, cored, seeded, and thinly sliced
- 1 red bell pepper, cored, seeded, and thinly sliced
- Salt and freshly ground black pepper to taste
- 12 oz cavatappi pasta (or other medium shape like campanelle or shells)
- 1 cup (8 oz) Cheez Whiz
- 1/4 to 1/2 cup milk (or light cream, or reserved pasta water, for thinning sauce)
- 1/4 teaspoon garlic powder (optional, for an extra flavor kick)
- Dash of Worcestershire sauce (optional, for depth)
- Crispy fried onions, for garnish (optional)
- Chopped fresh parsley, for garnish (optional)
Instructions:
- Prep the Steak & Veggies: If you haven't already, thinly slice your flank steak against the grain. Slice the onion and bell peppers. Set aside.
- Cook the Pasta: Bring a large pot of salted water to a boil. Add the cavatappi pasta and cook according to package directions until al dente (just tender with a slight bite). Right before draining, reserve about 1 cup of the starchy pasta water. Drain the pasta.
- Cook the Steak: While the pasta is cooking, heat the olive oil in a large skillet or Dutch oven over medium-high heat. Add the thinly sliced flank steak in a single layer (you may need to do this in batches to avoid overcrowding). Season with salt and pepper. Cook for 1-2 minutes per side, just until browned but still tender. Don't overcook! Remove the steak from the skillet and set aside on a plate.
- Sauté the Vegetables: To the same skillet (no need to wipe it out, those beefy bits are flavor!), add the sliced onions and bell peppers. Sauté over medium heat for 5-7 minutes, or until they are softened and slightly tender-crisp (or more caramelized if you prefer). Season lightly with salt and pepper.
- Make the Cheez Whiz Sauce: Reduce the heat to low. Add the Cheez Whiz to the skillet with the vegetables. Stir in 1/4 cup of milk (or cream/pasta water) and the optional garlic powder and Worcestershire sauce. Stir continuously until the Cheez Whiz is melted and the sauce is smooth and creamy. If it's too thick, add a little more milk or pasta water, a tablespoon at a time, until it reaches your desired sauce consistency.
- Combine & Serve: Add the cooked and drained pasta and the cooked steak (along with any accumulated juices from the plate) to the skillet with the cheese sauce and vegetables. Toss everything together gently until the pasta is well coated and everything is heated through. If needed, add a bit more of the reserved pasta water to keep it saucy.
- Serve Immediately: Divide the Philly Whiz Cavatappi among bowls. Garnish with crispy fried onions and fresh parsley if desired. Dig in while it's hot and cheesy!
Nutritional Estimate (per serving, approximate):
- Calories: 600-750
- Protein: 40-50g
- Fat: 30-40g
- Carbohydrates: 55-65g
(Disclaimer: This is a rough estimate and can vary based on specific ingredient brands, exact quantities, and steak leanness.)
Dinner Bell is Ringing (Philly Style!)
And there you have it – a ridiculously easy, incredibly flavorful Philly Cheesesteak experience, no hoagie roll required! This Stovetop Philly Whiz Cavatappi is proof that you don't need a lot of time or complicated steps to create a truly memorable and satisfying meal. Give it a try this week; I promise it's too good (and too easy!) to pass up.
Friday, May 23, 2025
Gouda Ham & Broccoli Baked Mac

This isn't your average mac-n-cheese - rich, nutty flavor of Gouda, savory ham, tender broccoli, and a crunchy, cheesy topping. It's a crowd-pleaser that's both satisfying and surprisingly sophisticated.
A Cheesy Symphony: The Star Ingredients
Gouda cheese is the star of this mac-n-cheese, providing a smooth, creamy texture and a distinctive flavor that's both mild and complex. The addition of ham adds a salty, savory note, while broccoli provides a touch of freshness and a welcome textural contrast. The crispy topping, made with breadcrumbs, aged white cheddar, and bacon bits, takes this dish to the next level, adding a satisfying crunch and an extra layer of flavor.
I never said I had to have everything complicated. And that hold especially true for this dish which I honestly based on the now defunct Ham, Broccoli, and Cheese hotpocket. Seemingly deconstructed into a mac and cheese dish that elevates the smoky flavor and enhances the ham by using the right cheese. Don't get me wrong, sometimes I'll use a blend that incorporates white and sharp cheddars into the mix to help balance the entire thing out. But if you're not feeling that, this is a straight forward dish that is sure to please even kids as long as you don't season the hell out of it. I found this out the hard way.
I enjoy baking these but if you have some panko breadcrumbs handy and bake them ahead of time, or some other already-ready-to-rock crunchy topping (I love throwing crispy jalepenos and onions over top of mine), you can skip the baking process entirely.
The good news is, it's hard to screw this dish up and easily modified to your liking. Bask in the simplicity- things usually get more complicated from here. (We're making boba at home over here!)
Tips for Mac-n-Cheese Perfection
- Don't overcook the pasta: Cook the pasta al dente, as it will continue to cook in the oven.
- Make a smooth cheese sauce: Use a roux (butter and flour) as the base for your cheese sauce to ensure it's creamy and lump-free.
- Grate your own cheese: Pre-shredded cheese often contains cellulose, which can prevent it from melting smoothly.
1 - Don't skip the topping: The crispy topping is what sets this mac-n-cheese apart. Don't skimp on the breadcrumbs, cheese, or bacon!
Wednesday, May 21, 2025
Spring Pea & Ricotta Gnocchi w/ Brown Butter Sage Sauce & Crispy Prosciutto

We're elevating the classic Italian dumpling with the vibrant sweetness of spring peas, the creamy lightness of ricotta, and a rich, nutty brown butter sage sauce. Topped with crispy prosciutto for a salty crunch, this dish is intelligent comfort food with a sophisticated twist.
Sunday, May 18, 2025
Szechuan Biryani

...AI made this photo a lot better than anything I could have done. Forgive my lack of confidence!
A Fiery Dance of Flavors
Imagine the aromatic allure of a traditional Indian biryani, with its fragrant basmati rice and tender, spiced meat, now imagine it infused with the bold, numbing, and spicy thrill of Szechuan cuisine. This Szechuan Phoenix Biryani is not just a meal; it's an experience – a culinary bridge between two ancient food cultures, reborn into something excitingly new. Get ready to ignite your taste buds!
From a Spark of Inspiration to a Culinary Inferno
This recipe was born from a late-night craving, a musing on how to elevate the beloved biryani into a new stratosphere of flavor. I’ve always adored the complexity of biryani, but sometimes I’ve longed for a bit more punch, a more assertive gravy to mingle with those beautiful grains of rice. Simultaneously, the captivating ma la (numbing and spicy) character of Szechuan food has always held a special place in my heart. What if, I thought, these two powerhouses could meet? Not just coexist, but truly meld, creating a dish that respects its origins while forging a bold new identity.
The challenge was to balance the fragrant, subtle spices of biryani – the cardamom, cloves, and cinnamon – with the assertive, fiery notes of Szechuan peppercorns, chili bean paste (doubanjiang), and dried chilies. The goal wasn't to let one cuisine overpower the other, but to create a harmonious explosion where every spoonful offers a journey. We're amping up the "curry" or the masala component, ensuring that the protein is enrobed in a rich, Szechuan-style sauce that generously coats the rice during the final dum cooking process.
Cooking this Szechuan Biryani is an adventure in itself. The kitchen fills with an intoxicating aroma – first, the warming scent of whole Indian spices, then the pungent, exciting fragrance of sizzling Szechuan peppercorns and chilies, followed by the savory depth of doubanjiang. As you layer the vibrant, jewel-toned rice with the rich, spicy meat mixture, dotted with crispy fried onions and fresh herbs, you know you're creating something truly special.
And the taste? It’s a revelation. The fluffy basmati rice, perfumed with saffron and whole spices, provides the perfect canvas for the tender, succulent meat that carries the signature Szechuan heat and a delightful numbing tingle. The savory, umami-rich sauce ties everything together, creating a complex, multi-layered flavor profile that will have you reaching for more. Each bite is a dance between the familiar comfort of biryani and the exhilarating thrill of Szechuan spice. It's a dish that's both bold and nuanced, fiery and fragrant.
Szechuan Phoenix Biryani: The Recipe
Yields: 6-8 servings Prep time: 45 minutes (plus 1-2 hours marination) Cook time: 1 hour 30 minutes
Ingredients:
For the Chicken Marinade:
- 1.5 lbs (approx. 700g) boneless, skinless chicken thighs, cut into 2-inch pieces
- 1 cup plain yogurt (full fat recommended)
- 1 tablespoon ginger-garlic paste
- 1 teaspoon turmeric powder
- 1 teaspoon red chili powder (Kashmiri or a mild variety)
- 1 tablespoon light soy sauce
- 1 teaspoon toasted and ground Szechuan peppercorns
- 1/2 teaspoon salt
For the Szechuan Gravy/Curry:
- 3 tablespoons cooking oil (peanut or vegetable oil recommended)
- 2-3 dried red chilies (adjust to your spice preference), broken in half
- 1 tablespoon Szechuan peppercorns (whole)
- 1 large onion, finely chopped
- 1 tablespoon ginger-garlic paste
- 2-3 tablespoons chili bean paste (Doubanjiang – adjust to your spice preference and saltiness of brand)
- 1 tablespoon light soy sauce
- 1 teaspoon Chinkiang vinegar (or black rice vinegar)
- 1/2 teaspoon sugar
- 1 cup chicken broth or water
- 1/2 cup chopped bell peppers (optional, for color and texture)
- Salt to taste (be mindful of salt in soy sauce and doubanjiang)
For the Rice:
- 2 cups aged Basmati rice
- 4 cups water
- 2-3 green cardamom pods
- 2-3 cloves
- 1-inch cinnamon stick
- 1 bay leaf
- 1 teaspoon salt
- Optional: A pinch of saffron threads soaked in 2 tablespoons warm milk
For Layering & Garnish:
- 1/2 cup crispy fried onions (store-bought or homemade)
- 1/4 cup chopped fresh cilantro
- 1/4 cup chopped fresh mint leaves
- 1 tablespoon ghee or melted butter (for drizzling)
- Extra toasted and ground Szechuan peppercorns for garnish (optional)
Equipment:
- Large heavy-bottomed pot or Dutch oven with a tight-fitting lid
Process/Steps:
1. Marinate the Chicken: * In a large bowl, combine the chicken pieces with all the marinade ingredients: yogurt, ginger-garlic paste, turmeric powder, red chili powder, soy sauce, ground Szechuan peppercorns, and salt. * Mix well to ensure the chicken is thoroughly coated. * Cover and refrigerate for at least 1-2 hours, or preferably overnight for deeper flavor.
2. Prepare the Rice: * Rinse the basmati rice gently in cold water until the water runs mostly clear. Soak in fresh water for 30 minutes. * Drain the soaked rice. * In a large pot, bring 4 cups of water to a boil. Add the green cardamom pods, cloves, cinnamon stick, bay leaf, and 1 teaspoon of salt. * Add the drained rice to the boiling water. Cook for about 5-7 minutes, or until the rice is 70% cooked (it should still have a slight bite). * Carefully drain the rice through a fine-mesh sieve and set aside. Discard the whole spices if you prefer, or leave some in for visual appeal.
3. Cook the Szechuan Chicken Gravy: * Heat the cooking oil in your heavy-bottomed pot or Dutch oven over medium heat. * Once the oil is hot, add the dried red chilies and whole Szechuan peppercorns. Sauté for about 30-60 seconds until fragrant (be careful not to burn them). * Add the finely chopped onion and cook until softened and translucent, about 5-7 minutes. * Stir in the ginger-garlic paste and cook for another minute until fragrant. * Add the chili bean paste (Doubanjiang) and cook for 2-3 minutes, stirring constantly, until it darkens slightly and the oil starts to separate. This step is crucial for developing its flavor. * Add the marinated chicken to the pot. Increase the heat to medium-high and cook, stirring occasionally, until the chicken is lightly browned on all sides. * Stir in the light soy sauce, Chinkiang vinegar, and sugar. Mix well. * Pour in the chicken broth or water. Bring to a simmer. If using bell peppers, add them now. * Reduce the heat to low, cover, and let it simmer for 15-20 minutes, or until the chicken is cooked through and the gravy has thickened. Taste and adjust salt if necessary. The gravy should be rich and flavorful.
4. Assemble the Biryani (Layering): * Remove about half of the Szechuan chicken gravy from the pot and set it aside. Spread the remaining chicken and gravy evenly at the bottom of the pot. * Spread half of the par-cooked basmati rice evenly over the chicken layer. * Sprinkle half of the crispy fried onions, half of the chopped cilantro, and half of the chopped mint over the rice. * Spoon the reserved Szechuan chicken gravy evenly over this layer of rice and herbs. * Top with the remaining par-cooked rice, spreading it evenly. * Sprinkle the remaining crispy fried onions, cilantro, and mint on top. * If using saffron milk, drizzle it over the top layer of rice. * Drizzle the ghee or melted butter over the top.
5. Dum Cooking (Steaming): * Cover the pot with a tight-fitting lid. To ensure a good seal, you can wrap the edges of the lid with aluminum foil or use a traditional method of sealing the lid to the pot with atta (wheat flour) dough. * Cook on the lowest possible heat setting for 20-25 minutes. This slow steaming process allows the flavors to meld beautifully. * After 20-25 minutes, turn off the heat and let the biryani rest, still covered, for at least 10-15 minutes before opening.
6. Serving: * Gently fluff the biryani from the sides of the pot, trying to get a mix of rice and the chicken gravy in each serving. * Serve hot, garnished with a little extra toasted and ground Szechuan peppercorns if desired for an extra numbing kick. * This biryani is fantastic on its own or can be served with a cooling cucumber raita or a simple side salad to balance the spice.
Nutritional Estimate (per serving, approximate):
- Calories: 550-700 kcal
- Protein: 35-45g
- Fat: 20-30g (will vary based on chicken cut and oil used)
- Carbohydrates: 50-65g
Subscribe to:
Posts (Atom)
Monthly Recipes & Posts:
-
 A striking, cross-cultural evolution of the classic burger that re-imagines the structural components of an Asian dumpling into a crispy, se...
 -
 The ultimate, game-changing backyard barbecue condiment that out-flavors everything in your fridge.
 -
 A zero-waste kitchen miracle turned legendary snack. These shattery, airy crisps give you all the satisfying crunch and melt-in-your-mouth ...